Recently I was doing some work on the car that required me to have the air lid and MAF off. I noticed the pooling of some oil on the bottom of the TB so I opened the blade and peeked into the intake with a flash light and confirmed my fears. It already had the sheen of a nice coat of oil already. I had only installed this intake back around Sept/Oct and did not expect the awesomely bad GM PCV system to foul it up so quickly. So to keep the problem from getting any worse I pulled the trigger on a catch can and make the decision to do a little redesigning of the PCV system.
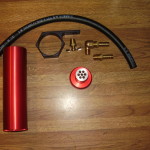
So FedEx dropped by this A.M. and brought me my shiny new Mike Norris Motorsports billet aluminum catch can & PCV valve.
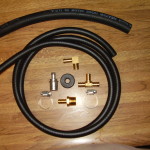
I then headed out to pick up the rest of the stuff I would need for my project. A trip to Advanced Auto to pickup a new valve cover grommet, some worm clamps, a 90* brass hose fitting, a short piece of heater hose and several feet of fuel line. Then off to Home Depot for a brass tee connector and a brass reducer that was essentially a water hose end.
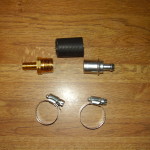
The first step was to take a short piece of the heater hose, reducer, PCV valve, clamps and assemble them.
Once I had the new PCV configuration together, it was time to pull the old system out.
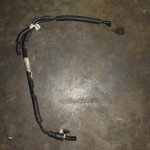
This is what GM thought was a good idea for the stock one. Hard plastic shaped tubing that is quite prone to breaking and did it’s job of relieving the crankcase pressure but did absolutely nothing to stop the oil vapors from entering the intake, heads and eventually the combustion chambers. My stock LS1 intake manifold was just lousy with oil when I pulled it off last fall. I had assumed that all the carbon buildup I had seen on the pistons and in the head runners was due to a gasket leak. I’m pretty sure now that this was the actual culprit.
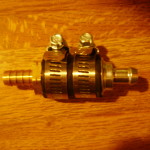
The existing valve cover grommet was fairly worn out and was easily removed so I am sure it was not providing a good seal for the vacuum. The inset at the end of the hose also was not very snug in the grommet and came out easily. I assembled all the brass fittings to various lengths of hose I cut and went to put it all back together. The new valve cover grommet was definitely a much tighter fit as the brass fitting did not want to go into it while it was in the cover and I ended up popping the grommet through the hole into the cover. So that added some extra time and effort into the install since I had to pull the coil packs and valve cover to get the grommet back out. Once I was able to man handle the grommet into the valve cover with the fitting already installed I am very convinced that there won’t be a lack of seal from this point on as it was a mother to get in. After getting the cover back on and the coils mounted back up it only took a few minutes to get everything situated and running again.
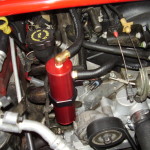
Here is a shot of the installed can. I wish that the red had been a little brighter to match the car but overall I am happy with it and hope that this will prevent oil from getting into the TB and intake in the future. The next step will be to pull the intake itself and let it soak in a degreaser bath.
