So I got back to work on the car today after a little break at the end of last week. What was supposed to be an extended weekend project is starting to look like what could be a month long ordeal. I fought for days trying to swap out the valve springs while everything was in the car. First using one tool from an LS1Tech forum member then another, outlandishly expensive, one from Comp Cams. They both work fantastically for removing the old parts but when it came to trying to align the valve stems in the center of the retainers to put the new locks on, it was next to impossible. In 2 days time I was able to remove four springs and install only two. That was when I got fed up with tightening down the tool dozens of times with nothing to show for it. So I decided to just pull the heads and do the work on a bench. I keep creating all this additional work for myself. I will say this though, anything to do with those damned heads in the future will see me pulling the engine.
I started today by pulling the intake manifold which wasn’t all that bad until I tried to disconnect the fuel line from the rails. It didn’t want anything to do with that. Tried for a couple hours with the supposedly quick disconnect tools that are the plastic disks that you put around the line and push them in to release the springs. That was a huge waste of time and frustration. After two different kits of the plastic rings I found a disconnect tool that was a couple pieces of metal held together my a rubber band. Tossed it on the line and 1.6 seconds later it was disconnected. Time to move on.
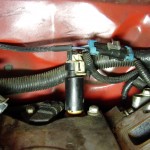
After removing the intake I was greeted by this lovely sight.
My oil pressure sending unit was broken off where it meets the threads. That would explain some of the unusual oil pressure readings I have seen at idle. Probably a source of oil leakage as well. Yay for having to spend more money.
Had to remove the exhaust yet again so that the headers could be moved around around to get to the head bolts. That’s one part of the car I am getting tired of working on. Maybe when I put everything back together I will drive around with open headers for a while before putting the duals back on.
So when I went to remove the driver’s side head, yet another problem jumped up and smacked me in the face. When I installed the headers in the spring I put in ARP header studs instead of re-using the bolts. While this made it super easy to install the headers by being able to just hang the gasket and the header itself while being able to take my time to thread the nuts on, it created a problem for head removal. As it turns out 2 of the studs are in the way of the flared bolt head and stop it from coming more than half way out. So with the header flange sitting all in the way in what little open space there was, I had to take on the painstaking task of using 3 fingers and a small allen wrench to remove the studs at the rate of about 1/8th of a turn at a time. At least I now know before hand for the other side and it won’t be so painful.
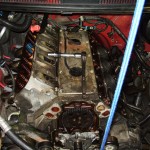
So with the head off I took a quick snap of all the space I now have available in the engine bay. Probably not something I’ll ever seen again.
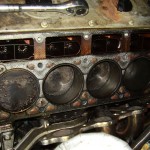
And here is a shot of the driver’s bank of cylinders. You can see some serious carbon buildup on the #1 cylinder where it has been burning oil. There is some buildup on the other cylinders but nowhere as bad as this one. You can also see several spots on the worn out graphite gasket where it has rotten away over the channels in the water jacket. This is most likely where I am getting coolant in my oil at. I suppose one way to look at this in a positive light would be that the head gaskets were in sore need of replacing anyway. I will be using some MLS ones when I put it back together instead of the graphite POS.
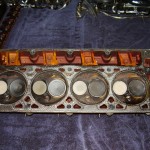
Here is a look at the combustion chambers on the head. It seems odd that only the intake valves have carbon scoring on them. You can also still see wet oil in more than one of the chambers. That gasket had to be doing next to nothing for a seal.
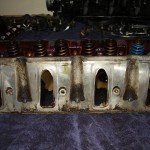
Here is another place where oil was getting where it should not be. These are the intake ports from the manifold. You can see a good amount of burnt oil here as well. Of course this could also be related to the crap PCV system in the LS1s that was corrected with the LS6.
Not sure how much work I will get done on it tomorrow since I have to travel a little in the afternoon to give an employee meeting and won’t get back until later in the night. However once I pull the other head and get the springs on I will probably go get several cans of brake cleaner and tidy up the heads, cylinders and block some so it isn’t so nasty looking with crud all over the place. It will be some busy work while the new head gaskets, bolts and sending unit are shipped. I would love to install some head studs but ARP wants in the neighborhood of $350 for them. Too bad I hadn’t planned on going this deep into the engine or I could have planned for more to be done such as the LS6 intake and PCV system. Other than that, my hands look like I’ve been in a fist fight with some razor wire. Some wounds are starting to heal already, that’s a sign this is taking too long. Slowly but surely it will get gone though. I am hoping no more than a week and that I don’t find any more problems.
With the shape some of this stuff is in, I don’t know if it is really worth doing much else to the engine. Maybe I’ll start saving up for an LS2 or LS3 longblock to swap in at some point.
