Monthly Archives: February 2014

The Headlight Saga Continues

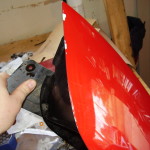
So I went ahead with contacting the ebay seller about the issues I found when installing the headlight.  They responded pretty quickly and offered some solutions, though none were to just give me a quick discount.  So we talked a little and since this was the only assembly with a red door we agreed for me to pull the door, then send the rest of the assembly back.  I came home friday evening from work, pulled the part back out and boxed it up to drop off at fedex.  I’m hoping to have the replacement by mid to late this week so I can get back on the road.

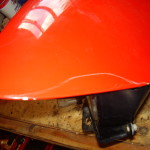
In the meantime I decided to try my hand at repairing the damage to the door that was ripped off by the trash can.  It had some pretty deep scratches going down into the metal on a couple spots.  I wasn’t aiming for this to be an oem level job, just something that was better than it currently was.

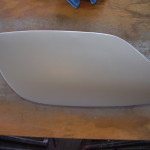
I started by sanding the old paint off.  In hindsight, I should have taken the entire door down to metal instead of leaving a good deal of the original primer coat on as you can see the rough grit sandpaper gouges in the original primer if you look closely.  This became more evident after the new primer coat was applied and I really didn’t feel like re-sanding it all over again.

Headlight Door Sanded


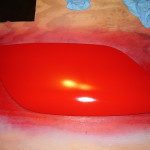
I then wiped it down with alcohol to remove any residues and hit it with a few coats of primer.  Let it dry then gave it a few swipes with 2000 grit paper, another alcohol wipe and a few more coats of primer.

Headlight Door Primed


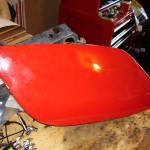
After the last primer coat dried I gave it another once over with 2000 grit and one last wipe down.  I then proceeded to the paint phase.  I picked up some Duplicolor Perfect Match from Advanced Auto to do the job with as this is supposedly the same paint color that is GM OEM.  I went over it with several coats until I was satisfied no primer was showing through, waited a little while and then put on a few coats of clear.

Headlight Door Painted


I’m going to let it cure for a few days and then go at it with some rubbing & buffing compound to see if I can make it shine.  Hopefully once that is all done, it will be at least a close color match for the car.


Auto Eye Surgery

The replacement headlight assembly came in today.  It was a pretty straight forward job of getting it swapped out.  The paint was, as I had figured, pretty raggedy on the replacement.

Replacement Headlight 4 Replacement Headlight 5 Replacement Headlight 6 Replacement Headlight 1


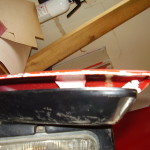
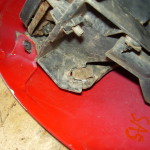
After removing the bezel it was covered pretty good in a thin coat of dried mud so I am fairly certain it is from a car that ran afoul of the ground at some point.  Likely out of a totaled donor, which would explain the messed up paint all around the edges as well.  One of the mounting points for the cover was broken as well causing the door to have a little give on one side.  The wiring harness had also been cut and spiced at some point but I don’t know what the reasoning behind it was and it was done a little sloppily as I could see bare copper on one of the wires.  Taped it up some and will have to come back at a later date to fix that if it causes any issues.

Replacement Headlight 2


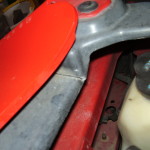
Unfortunately while in there, I found some secondary damage to the upper bumper support.  The fiberglass had broken clean through.  This won’t be a high priority fix  as it isn’t really affecting anything and I don’t want to spend more money on this at the moment.

Broken Support


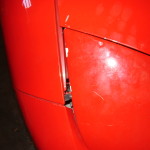
Once it was all bolted up, it was able to open and close without an issue, but there is a bit of a gap issue that I will need to get sorted out for it to look proper again.  It’s about a quarter of an inch too far over on one side.  The lamps that came in it are terrible and are probably stock units.  I’ll have to go pick up some replacements.  Now I have to decide if it is worth contacting the ebay seller about the flawed wiring and broken door support or just let it go.

Replacement Headlight 3


It Never Ends…

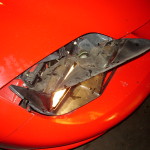
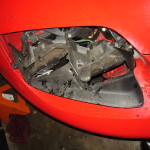
If it’s not one thing, it is always another.  I just can not get a break it seems.  I stopped by to visit with my folks some tonight and on the way home, not more than 50 yards after pulling out of their subdivision I come upon this massive freaking trashcan laid out right in the middle of my drive lane and I simply could not move out of the way quick enough to avoid it.  The result is my passenger side headlight is essentially destroyed.  The light itself surprisingly worked all the way home despite having it’s glass shattered and moisture constantly getting on it.  So after just now getting the car back on the road this week I now have to garage it again until I can find a replacement headlight that doesn’t cost me an arm and a leg.

Busted Headlight 1Busted Headlight 2


T56 Swap – First Impressions

It’s been a couple days since I wrapped up the driveline swap in the bird.  I had mostly just put a few miles on it putting around in town while getting back in the hang of driving a stick.  Today I took her to work and while cruising down the interstate doing 75, I was only running at 1500RPM in 6th gear.  By having the auto gearing in the diff, it is going to make for a gas sipper at highway speeds regaining some of those lost MPGs.

I also had the first snafu with the new setup this evening.  I backed out of the driveway and gave it a tap in first to make it up to the stop sign at my corner.  Then all of a sudden the clutch was like a rock and I couldn’t get it into gear.  It was a good thing I was still next to my house so I pushed her back to the driveway and into the garage.  I was dreading that it was the cut rate slave cylinder that I had picked up from Autozone and did not feel like pulling the trans again so soon.  I put the front end in the air and opened the bleeder valve to see if I could relieve some of the pressure.  No go.  I was going to pull the master line out of the slave and check it but when I went to disconnect the fitting, it just popped out without any effort.  I must not have seated it well and I was lucky that it was working at all these past couple days.  Re-seated the fitting and all was good.  Went for a bit of a test drive and no further problems.  I am enjoying being back in a stick shift so far.  I just have to be careful not to blow up the 10 bolt before I have the chance to save up for an S60 rear end.


Driveline Swap Wrapup

After I got home last night I popped in the 2 missing fuses and voila!  She liiiiiiives!  Fired right up and I did some adjusting to the clutch master cylinder.  At first none of the gears wanted to engage but after working with the clutch a little bit and some repetition they started going in.  Took it for a quick test drive but couldn’t do much because of the rain.  There was also the fact that my speedo is way off because of the different reluctor wheels.  It also threw a bunch of CEL codes because it couldn’t find the auto trans any longer.

Today I was feeling a bit under the weather and left work in the early afternoon.  When I got home I grabbed a stock m6 tune from then HP Tuners repository and licensed it.  Made a few tweaks to get rid of the rear O2 sensors, disabled CAGS, the speed limiter and the AIR system.  Flashed the new tune to the PCM and started her up.  Took a little bit to re-learn the idle but once she did, I took her off to walgreens for drugs and kroger for a few food items.  It shifted much better now and the reverse lockout was working properly so I didn’t have to strong arm it into reverse.  The only problem I have now is that the rear hatch release button isn’t working.  I guess splicing it into the e-brake ground wasn’t good enough and I might have to just short the connection and hope that I don’t hit the button at highway speeds.

I also went by Advanced Auto on the way home to pick up a new air filter since I have not changed mine in at least a year.  This one dude in there was trying so hard to sell K&N filters.  Was telling everyone in the store that they should check them out.  And the sad part is that he didn’t even know what they were.  He claimed to have one in his vehicle and that it increased his power, efficiency, ect ect.  Only, he kept calling them K&L filters.  Went on about how they were washable and re-usable.  Told him no thanks and that I didn’t want oil in my intake tract.  He just looked at me for a few seconds and proclaimed that no oil was involved in their use which just went to show how little he actually knew about the product.  Told him no, I will stick with paper.

Now I just need to find the time to tune the rest of the motor.  After I get rid of whatever plague is trying to afflict me.


Driveline Swap in Progress – Day 5

The weather was decently nice this past weekend.  Too bad I wasn’t able to cruise around some and enjoy it.  This made me want to get this project done so that I could get the bird back on the road where she belongs.  I’ve been working on this for a month now but only really being able to put in maybe 1 day a week toward actually getting anything done.  I set myself a goal of putting in time this weekend to try and wrap it up.

I started by crawling under the car and getting everything back in place.  Installed the new UMI relocation crossmember in place and bolted the torque arm up.  This was so much easier to do in with the T56.  It took maybe 15 minutes to get the hard to reach bolts in and tightened where as I fought with the auto version for hours.
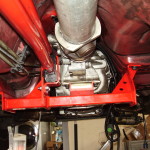
T56 Installed


Next we move inside the cabin and start on some of the wiring.  Here is the plug that used to go into the auto shifter for control.  It needs to be hacked off and everything re-wired for the new transmission.
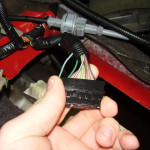
Auto Shifter Plug


You end up with 6 wires but only need 5 of them, although some do use all 6.  I had to add a pigtail to the light green & brown pair and run it down to the trans for the backup lights.  Then the dark green & purple/white wires got run over to the pedal assembly and connected to another pigtail for the clutch neutral safety switch.  It was hard to find confirmation of what the polarity of this should have been but I think I have it correct, time will tell.  Here is where most folks simply wire the black/white & orange/black together to ground out the hatch release switch.  However by doing this it will allow the hatch to be opened at anytime, such as when you bump it with your knee while doing 80 down the interstate.  Instead I decided to splice it into the e-brake wire so that in theory it should only allow opening when the e-brake is engaged.  The black/white is just a common ground so I tucked it under the dash.
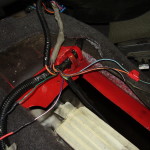
Auto Plug Re-wired


Next I headed back under the car to finish up the wiring.  Here I had to borrow a couple wires from the 4L60E case plug for the reverse lockout solenoid.  I dug through it and found a hot wire for power and one that lead back to the PCM that the auto used for TCC control.  I spliced in the pigtail and then had to re-pin the PCM wire to another spot so that when I flash a 6 speed tune it will be able to control the solenoid.  Many people just wire it straight to the brake pedal so that it energizes whenever the brakes are applied to ensure that they are depressed before allowing you to go into the reverse gear.  I chose to try handling it the way a stock manual car would.  This way the PCM will handle the energizing of the solenoid on an as needed basis and should extend the life of the solenoid itself by not being turned on/off every time I touch the brakes.  I also needed to snip the VSS connector and extend it a little since the T56 location is a bit different than the auto.  I also discovered soldering connections while upside down was a little more challenging than sitting at a table.
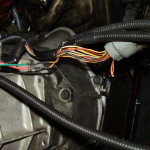
4L60E Wiring Splice


Next up I hopped back in the cabin and bolted the shifter to the trans.  While normally this isn’t anything noteworthy, this case it led to a great deal of cursing.  I clean up the surfaces real good and go to put a bead of RTV around the perimeter.  I get about a third of the way around and POP, the back of the tube came unsealed and I end up with RTV all over my hand.  I say ok to myself, clean up and grab a fresh tube.  I get about three quarters of the way around and POP, this tube seal at the end comes open too spilling RTV all over the place.  And this my friends is why even through cheap RTV from HFT will make an adequate seal, it should still be avoided.  I clean all that off and find a new unopened tube of permatex black ultra in the cabinet.  Score!  Open it up and the first half of the tube is already set making the whole thing unusable.  Apparently it had a factory defect where it never completely sealed the tube with the metal covering you normally have to poke through.  So I had to head out and pick up another tube and finally got a bead on it and bolted down.
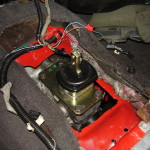
Shifter Installed


Next up was fitting the rubber dust boot in place, drilling some starter hole for the self tapping screws and getting it tightened down.  This should help the road noise from the hole I had to cut in the tunnel.
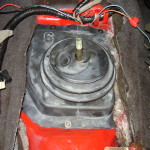
Dust Boot Installed


Next up was installing the shifter handle.  Here is a side by side comparison of the stock hurst and the UMI short throw.  The hurst knob absolutely refused to be taken off so much that the glue broke free and the leather covering was spinning on threaded handle.  So I couldn’t remove the boot for a clearer comparison.
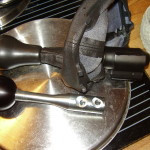
Shifter Handle Comparison


And here are a couple shots to show how much of a difference it makes when they are installed.  The short throw handle also has a tilt toward the driver for a more comfortable feel.
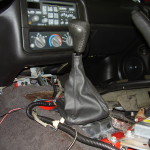
Stock Hurst Handle InstalledUMI Short Throw Installed


With that done I moved on the the part I have been dreading for the entire project.  Installing the Tick adjustable master cylinder.  Here we are prepping the firewall to accept the new part.  I cut out the plastic piece where they go and holding the brace against the firewall tried to mark the best I could where the holes would need to go.  I was able to get the 1-3/4″ hole for the cylinder rod without much issue but making the bolt holes was more challenging as the drill bit kept wanting to walk around.  Unfortunately it is very cramped in that space with the pedals already installed and wasn’t much room to move around and the holes got a little messy.
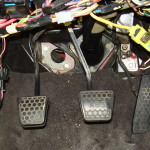
Master Cylinder Location


The new master cylinder is huge in comparison to the stock unit and I somehow had to wedge it between the steering knuckle and brake booster.  In the end I had to remove the coil packs and manhandle a thick part of the wiring harness out of the way, but I finally got it in there.  It was a bit of a challenge to get the rod through the hole as well since there was no longer any room for my hand down there.  Some creative use of a telescoping magnet and a lot of guess work and it was done.  I then went into the cabin to quickly screw the turnbuckle back onto the rod before it decided to fall back out of the hole.  Next came the lengthy and curse filled process of trying to maneuver the MC block up against the firewall to put the bolts in.  I came to the conclusion that the Tick provided bolts simply were not long enough.  The ones that came with the cylinder were 5/16 x 1/2″ and I could not get them to thread in, no matter how hard I tried.  I did have some spare 5/16 laying around and while still having to fight a lot to get one in, I was able to get it done.  Only to find out that the longer bolts I had were a tad too long at 1-1/2″ in length.  So I had to undo all that aggravating work and remove the bolts and headed to the hardware store to pick up some more in various lengths along with some lock washers.  Having already been able to get the longer ones threaded in, it wasn’t so much of a challenge the second time and I was able to get them in and tightened using ones that were 1″ long.  If I ever, and I mean EVER have to do that again it will be too soon.
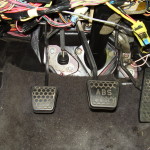
Master Cylinder Installed


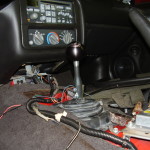
With that done, it was just a matter of putting in all the fluids, bleeding the clutch and re-installing the interior pieces.  And here we are, all buttoned up and ready to go!
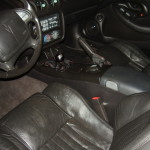
T56 Swap Finished


So I hop in, push the clutch down and turn the key.  Nothing.  Car has power, the headlights work, ect but it won’t turn over.  At that point I was too tired to even deal with it anymore so I just went to bed.

While laying in bed trying to sleep I remembered that I had pulled the gauge pod out for a make over and in the process, removed 2 expandable circuits from the wiring thus leaving 2 fuses missing from the block.  I am hoping that is the entirety of the problem and I will be able to get it started when I get home tonight and maybe get it flashed with a 6 speed tune so everything will work properly.  Another cause might be the clutch safety switch could be wired in backwards.  So close, yet so far away.
 

Gauge Pod Re-Wire

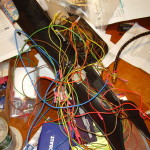
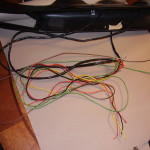
With the thunderstorms going on making the weather all dreary I didn’t really feel like crawling around on the garage floor so I decided to take it easy.  Instead I decided to work on the wiring for the gauge pod.  It looked like a rat’s nest when I pulled it out.  And this is with only 2 of the gauges, one had already been removed so just imagine another couple feet of 5 additional wires all mixed in there.

Gauge Pod Wiring Mess


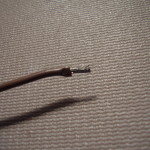
There are a few reasons that I wanted to do a little work on this.  One is that when trying to install the thing, having 15 wires going every which way makes the job more difficult while trying not to pinch any and cause future issues.  Another is that I think some of the butt connectors that were crimped on did not establish the best of connections.  Lastly I was having issues with one gauge in particular not really working and would bounce around a lot which makes me think it is a grounding issue either in the harness or on the senders.  This next shot is one of the reasons that I wanted to get rid of crimps.  It had pulled right out of the bullet connector to the sending unit.  Had no idea until I saw it hanging under the car while removing the transmission.

Failed Crimp Connection


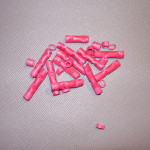
So I cut all the lame crimps off.  Huzzah!

Crimp Connectors


Stripped the wires down and soldered them together for a connection that will be just as strong as a single wire.

Soldered Joint


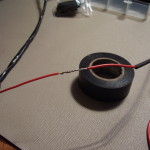
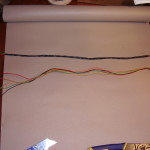
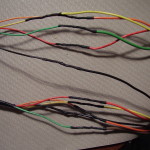
I then wanted to tame the nest a little bit and make it a little more streamlined.  So I grabbed a roll of electrical tape and started wrapping.  Here is the before and after of the main gauge harness.

Wire Wrap Comparison


And here we go with the gauges wired into the extension harness.  All connections are now soldered with heat shrink wrap around them.

New Wiring Connections


I then went back to wrapping with the tape until I got to where everything joined into the main lines that need to be wired into the car harness.  I left a good bit of that unwrapped for now since they will need to go to various places under the dash.  I’ll do the final wrapping once the gauge pod is back in the car.

Gauge Pod Wiring Harness


On a final note, I believe I have found something to fill the empty hole where the trans temp gauge was at.  I am considering putting in a vacuum gauge to monitor the draw in the intake to make sure that I am not springing any leaks.


Driveline Swap in Progress – Day 4

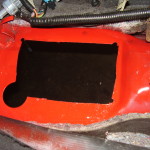
I had the opportunity to work on the swap some more today.  The first item of the day was removing the shifter, masking off the opening to avoid debris and test fitting the T56 into the car.  Once it was in place I bolted up the crossmember so it would be in it’s approximate position once actually installed and then traced the shifter outline on the bottom of the trans tunnel.  I then pulled the trans back out, marked off some guide spots and drilled a few holes.  Then came the fun part, getting to cut up the car with a sawzall and cutoff wheel.  Once I had the opening cut out I took a file to the edges to try and remove some of the sharper bits to avoid rubbing and cutting into the lower boot.  I then gave it a quick shot with some red caliper paint to make the fresh cuts a little more rust resistant.
Modified Trans Tunnel


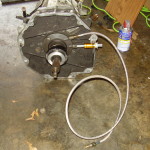
Next I moved on to a few items on the T56 itself.  I pulled the old slave cylinder and set it aside to deal with later.  I then bolted up the new slave and removed the stock bleeder screw and replaced it with a Tick Performance speed bleeder.

New Slave and Speed Bleeder


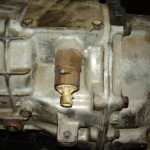
The next to do item was getting rid of CAGS.  The Computer Assisted Gear Selector (CAGS) or Skip Shift as most know it, was an idea established in attempts to make the transmission more efficient by forcing you to shift from 1st to 4th under particular sets of circumstances.  Yea, I don’t think so buddy.  I will shift into what gear I want, when I want it.  Here is the CAGS solenoid that I’ll be removing.

CAGS Solenoid


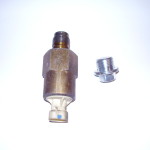
That sucker was so large that I didn’t have a single wrench that was large enough to fit.  Even my crescent wrench wouldn’t open that large, close but not quite.  I had to break out the adjustable plumbers pipe pliers to get it off.  Here is a side by side comparison of the solenoid and what I will be replacing it with.

CAGS Solednoid and Oil Plug


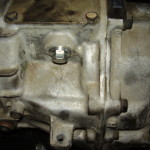
I took the rubber o-ring off the solenoid and put it on the oil plug to give it a little more sealing power and installed it.  This cleaned up that side of the trans nicely.

CAGS Hole Plugged


I then slide the trans back under the car and re-installed it.  I don’t understand why folks say they have such a hard time getting this one installed.  To me it was much easier than getting the 4L60E dowel pins lined up on the block, maybe 10 minutes and I was putting the bolts in.  It is now all torqued down and I just need to swap the trans mount over from the auto and then bolt the new crossmember into place.

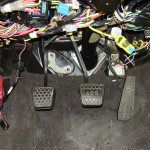
I also went ahead and bolted up the M6 pedals inside the cabin.  They really weren’t as much of a nightmare as I thought that they would be considering how much of a pain getting the A4 pedals out was.  Once they were all bolted up I pulled out the drill and made the bolt holes for the master cylinder but wasn’t able to cut the hole for the MC yet since I neglected to get an arbor for the hole saw I am using.  I can tell that getting this MC installed by myself is going to be a long exercise in colorful language.

M6 Pedals Installed


Since I couldn’t do anymore with the pedals today I decided to pull the triple gauge pillar pod out.  When I originally installed it, I just used a bunch of crimped butt connectors to make all the connections.  It’s an eyesore to look at and I think might be the cause of a grounding issue for the gauges that I’ve been seeing from time to time.  I am going to solder the wires together this time and heat shrink them for nicer connections.  I still don’t know what I am going to put in the 3rd slot on the pod now that the trans temp gauge is gone.  Here is the giant rats nest of wiring that it is right now.

Gauge Pod Wiring Mess


I’ll probably pick back up tomorrow with the MC install but if it irritates me too much I will probably move on to redoing the wiring and take it easy for the day.