Author Archives: Chris

Another day, another fix

So a few days ago while driving at highway speeds I started to notice that the torque converter would randomly unlock causing the engine to spin at a higher revolution to maintain the same speed and then drop back down.  So I took a gander at the tranny fluid and it was looking a little low and fairly dark.

I decided to go ahead and drop the pan to do a filter change while I was at it and since my family is about to head out on a lengthy road trip I opted to do the same on their ’05 Grand Caravan.  Yesterday I head out to pick up all the materials needed and while driving around I noticed the voltage beginning to dip from it’s normal 12v – 12.5v range down to around 11v-11.5v.  As the day went on, it dipped a little further and thoughts of the alternator came to mind but a couple times it would shoot back up normal.  So, at this point I wasn’t sure if the culprit was the alternator or gauge/wiring.  But on my way home from the folks last night the lights were dimmer than normal and this morning it wouldn’t start.  That pretty much cinched it up.  Time to shell out more for repairs.

So today I went ahead and ripped out the old alternator & battery then got a lift to the parts store where I picked up a new one.  Only this time instead of a stock 102A CS-130 replacement for the F-Bodies I decided to move up a little bit and grabbed a 145A AD-244 unit that usually only shows up in the larger trucks & SUVs.  The case was only slightly larger but there are several improvements.  The old style CS-130 series didn’t have any ports on the back cover for airflow and used some type of ducting system to try and move the air out, the AD-244 has a couple dozen ports on the back cover for good air flow.  Another major upgrade is that instead of stacking the positive & negative bridge rectifier diodes on top of each other they separated them out into positive & negative halves with more spacing for better heat dissipation.  I also had to remove the third bold bracket from the block as the truck alternator didn’t have a provision for it.  Fine by me since that bolt was utter hell to get to in the first place.  Once everything was cleaned up and put back in charging is back to normal and actually a little better than it was before.  Not to mention it cranks out more amps so that it won’t have to work as hard to keep the battery charged and the electronics in the car will have more juice to do their jobs.

I suspect the failure was caused by the leaking power steering reservoir which sits directly above the alternator.  I need to put rebuilding that a bit higher up on my list of items now since I don’t want to kill the new unit.

And of course it doesn’t stop there.  Yesterday the passenger window motor pretty much died and it’s quite difficult to get the window back up.  So I went ahead and picked up another motor for that and will likely be installing that tomorrow.
 

New Gauges Installed

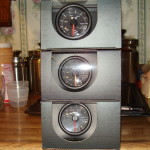
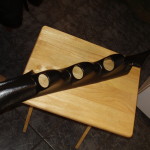
Today I wrapped up the latest project, installing some new gauges to get better readings from the car.  I picked up a triple gauge A Pillar pod from GlowShift along with Water Temp, Fuel Pressure and Trans Temp gauges.

Here is a shot of the items after unboxing.

Triple gauge pillar pod  New gauges


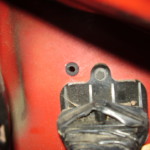
I had to make a new access point in the firewall in order to run the sending unit wires since there is no open areas in the driver’s section of the dash.  The most difficult part about this was actually drilling the hole since it was like working on a puzzle trying to get the drill in the cramped spaces.

New firewall access


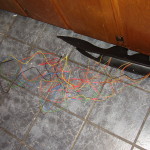
And  here is the absolute mess of wires before I put the A Pillar back into the car and ran the sending wires.

Fun with wiring harnesses


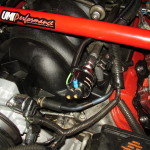
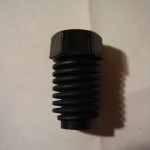
The Fuel Pressure was easy enough to install since all I needed to do was remove a schrader valve at the end of a fuel rail, screw on an adapter and install the sending unit.

Fuel Pressure Sender

The new Water Temp unit was a whole other story.  I couldn’t just replace the stock sender as the PCM would freak out when it was no longer getting a reading.  So I had to use another location on the other head.  Which happened to be allllll the way in the back and a pretty big pain in the ass to get to with the head still on the engine.  So after removing the coil pack and much cursing while trying to remove the plug without actually being able to see what I was doing I was able to get it out.  So after about a quarter of my coolant vacated the block I installed the new sender and ran the wires for it.

New Water Temp sender


I spent a good couple hours trying to install the Trans Temp sender without luck.  My hands are simply too large to fit in the space where the pressure test port is on the trans.  This one will have to wait until I drop the trans to install a new torque converter.  I will likely swap the pan out at that time as well and just tap the pan for the sender location.

Here is a short video of the gauges after I wrapped up the install.

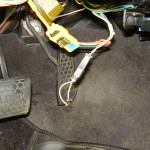
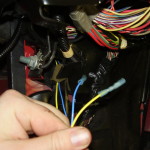
I also found yet more wires not connected to anything when I pulled the dash panels off.  It is a miracle that this car actually operates with as many cut and disconnected wires I am finding through out it.  No idea what they go to so I will have to do a little research.  Also if you look in the upper left corner of the second picture, you will see the grounding nut that has a ring connector on it with yet another pair of wires that were just cut off and the connector left there.

OLYMPUS DIGITAL CAMERA  OLYMPUS DIGITAL CAMERA

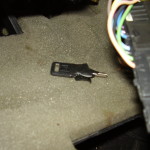
The other surprise I encountered when pulling the panels off was the spare ignition key for the car.  What it was going hidden in the under dash panels is beyond me.  It was also wrapped in electrical tape for some strange reason.

Surprise spare key


I went for a little test drive afterward and to show how lax and inaccurate the stock water temp gauge is, the new one was reading as much as 30* difference when cruising down the interstate in the cool night weather.  The stock gauge basically warms up and sits at 210* unless something goes horribly wrong and by the time it starts to move it is already too late in most cases.


Top End Refresher – Done

So I wrapped up the work I was doing on the top end the other day.  I am happy with most of the work but not all of it.

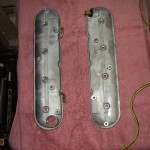
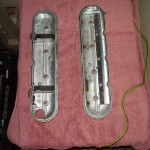
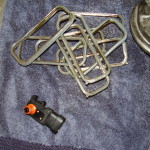
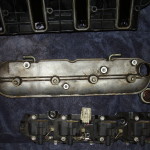
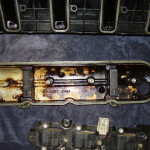
Here are some shots of the valve covers after I pulled them from the degreasing bath.  The thing that I never noticed because of all the caked on filth that this brought out was that on every single one of the bolt bosses on the valve covers where the coil brackets are secured has visible stress fractures.  I don’t know if some shade tree guy went to town when bolting them down at one point or if they were just over torqued from the factory.  Either way it was ugly and I might consider some new covers in the future.  Probably after market since the cleaning showed me just how crappy the casting process for these covers was.  There was flash and burrs all over the covers surface along with sharp edges I never noticed before.  You could also see the obvious pour channel break marks.I guess GM figures you would see so little of the covers due to the coils being mounted on top of them that no one would care.  Of course if I get aftermarket covers that also means I would need to relocate my coils which will be an ordeal in and of itself since there is really no room in the F-Body engine bay.

Valve Covers - Top     Valve Covers - Bottom

I re-blacked the coil brackets with a couple coats of paint but they were mostly fine.  I sprayed the covers with some red to try and match the color of the car and it went mostly well.  There were some spots where the burrs were or where I guess I didn’t scuff it up well enough with the 60 grit that the paint didn’t want to stick to.  I didn’t worry too much about it because of the aforementioned problems with the covers themselves so I wasn’t going to put too much time and effort into something I was going to replace in the future.  I tried to spray the coils some as well but I apparently didn’t clean them well enough as the paint went all splotchy on me which I assume was from oil residue I missed.  I will say that if you are standing at least 5 feet away and not scrutinizing it too closely that the covers look much better now.
Here is a shot of the covers after mounting them back to the heads before stacking everything else back on.

Mounted Covers after Painting


And here is everything fully assembled.

Assembled after degreasing


The new PnP TB seems to have smoothed out the throttle alot.  I have only had it on for a few days now but so far I have not experienced any attempts of the cam to push through the brakes like it tended to do sometimes beforehand.  This will of course be fully corrected once I am able to swap out the stock torque converter for one that is better built and rated for a higher RPM flash.  This will not only resolve any poor driving manners the car has put will also put me where I need to be in the powerband of the cam much sooner.  I also like the new accent that putting in stainless bolts has over the stock equipment.


Top end refresher

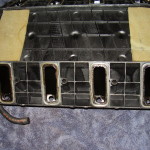
I started a project this evening that is mostly a clean up job but does have one aspect that will boost the fun factor a little bit.  I pulled off most of the top end of the car in order to get rid of the oil build up that occurred since putting everything back together at the end of the summer and installing the catch can last month.  It really was astonishing how much oil was getting through the stock PCV system and into the intake tract and therefore the cylinders.  It was only about four and a half months and approximately 5000 miles since I put everything back together in Sept and when I installed the catch can in Feb.  Here are some shots of how oily everything became in that short of a time and distance.

The runner seals were completely coated as was the MAP sensor.  I am sure that was causing some slight havoc with the pressure readings in the intake.

Oily Seals  Oily Intake 1

The inside of the intake also had a healthy film of oil all over it.  When installed in Sept it was bone dry.

Oily Intake 2


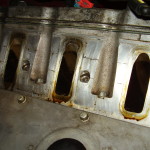
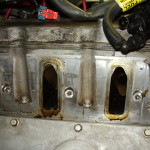
A couple shots of the buildup around the intake runners of the heads.  There is so much from around the seals that it is just oozing down the head.  You can also see that for a good couple inches into the intake runner itself there is a black buildup of oil residue.  I am sure that the next time I pull the heads that the pistons will be filthy with oil and carbon buildup.

Oily Heads 1  Oily Heads 2

Here you can see just how much oil the catch can has prevented from getting into the throttle body and intake since I installed it less than a month ago.  This is from approximately 600 miles driven.

Catch Can Results


The valve covers were just absolutely filthy as well.  I had tried to do a little clean up on the at the end of summer when I did the cam swap but you can see they are still pretty dirty.  And the inside has substantial buildup as well.

Dirty Valve Cover  Dirty Valve Cover 2

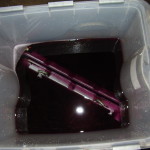
So once I had everything broken down I tossed it in a tub and gave it a degreaser bath.  Going to let it sit overnight so it can break all that gunk down and maybe I can get rid of most of the buildup.

Parts Bath


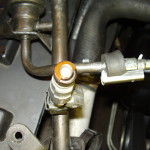
Unfortunately, as always, I found another problem during the tear down.  Some of the injectors had cracked/broken disks that separate the o-ring from the cylinder.  I am not sure what effect if any this is having on the fueling or if some unmetered air might be slipping past but it looks like I will be upgrading these sooner than later.

Busted Injector


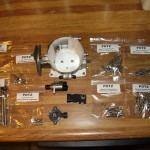
So enough of the dirty talk.  Here is part of the reason for doing the clean up.  Some shiny stuff to put on.  It’s stainless steel bolts and washer sets for the MAF, TB, throttle cable bracket, TB sensors, fuel rail, intake, coils and coil brackets.  There is also a ported and polished throttle body and new MAP, TPS & IAC sensors.

Top End Parts


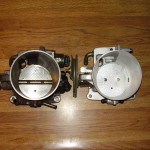
And here you can see a good comparison between the old TB and the new one.

Throttle Body Comparison


Hopefully I will be able to get the cleaning finished tomorrow so I can begin re-assembling the car again.


Breathing Easy

So yesterday I put my A/C belt back on that I removed a couple months ago because of it’s horrid squealing and to get back at me it decided that it was necessary to make up for all the lost time by increasing both the volume and intensity of the noise.  This simply won’t do so I popped by Advanced Auto after work today and picked up another belt.  Well, since I was already disassembling the airbox to get at the belts I decided to do a little modding while I was at it.

As it sits, the stock airbox for the LS1s is a bit restricting in my opinion with only two small slits feeding air to the filter.  One is on the front of the airbox itself while the other is on the A/C condenser coil shroud.  The other restriction is that half of the air filter itself is essentially blocked off by a couple of large plastic pieces.  We’ll just have to do something about that.

Here is the airbox with half of the work completed.  On the right you can see how it is setup stock with only half of the airspace being open.  On the left is where I hacked out all the obstructive plastic to open up the flow.
Cutting up the airbox


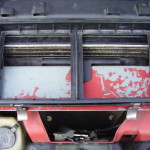
Once I finished that I fitted the airbox back to the car.  However as you can see here, there is still a large restriction in the form of the A/C condenser coil shroud only having a small slit in which the air is allowed into the box from the air dam below.  That will need fixing too.
Modified airbox


After a few highly precise and skilled wacks at the shroud with my utility knife, I now have an air opening about five times the size.

Modified airbox finished product


After putting the intake back together I decided to take her for a test spin.  Only it wouldn’t stay cranked and would die on idle.  This is where one remembers the importance of double checking that everything is back where it should be and that plugged in MAF & IAT sensors are crucial for operation.  So with that small snafu corrected off we went.  I immediately noticed that throttle response is greatly improved and there isn’t a delay in pushing the pedal and having something happen any longer.  Oh, and the belt squeal is gone, yay.


Rebirth of the PCV system

Recently I was doing some work on the car that required me to have the air lid and MAF off.  I noticed the pooling of some oil on the bottom of the TB so I opened the blade and peeked into the intake with a flash light and confirmed my fears.  It already had the sheen of a nice coat of oil already.  I had only installed this intake back around Sept/Oct and did not expect the awesomely bad GM PCV system to foul it up so quickly.  So to keep the problem from getting any worse I pulled the trigger on a catch can and make the decision to do a little redesigning of the PCV system.

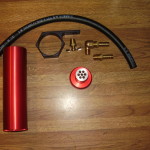
So FedEx dropped by this A.M. and brought me my shiny new Mike Norris Motorsports billet aluminum catch can & PCV valve.

Catch Can


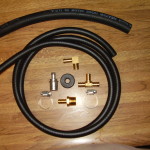
I then headed out to pick up the rest of the stuff I would need for my project.  A trip to Advanced Auto to pickup a new valve cover grommet, some worm clamps, a 90* brass hose fitting, a short piece of heater hose and several feet of fuel line.  Then off to Home Depot for a brass tee connector and a brass reducer that was essentially a water hose end.

New PCV system materials


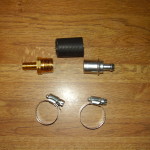
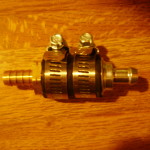
The first step was to take a short piece of the heater hose, reducer, PCV valve, clamps and assemble them.

New PCV valve setup parts    New PCV Valve setup

Once I had the new PCV configuration together, it was time to pull the old system out.

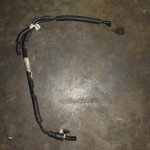
Old PCV system


This is what GM thought was a good idea for the stock one.  Hard plastic shaped tubing that is quite prone to breaking and did it’s job of relieving the crankcase pressure but did absolutely nothing to stop the oil vapors from entering the intake, heads and eventually the combustion chambers.  My stock LS1 intake manifold was just lousy with oil when I pulled it off last fall.  I had assumed that all the carbon buildup I had seen on the pistons and in the head runners was due to a gasket leak.  I’m pretty sure now that this was the actual culprit.

The existing valve cover grommet was fairly worn out and was easily removed so I am sure it was not providing a good seal for the vacuum.  The inset at the end of the hose also was not very snug in the grommet and came out easily.  I assembled all the brass fittings to various lengths of hose I cut and went to put it all back together.  The new valve cover grommet was definitely a much tighter fit as the brass fitting did not want to go into it while it was in the cover and I ended up popping the grommet through the hole into the cover.  So that added some extra time and effort into the install since I had to pull the coil packs and valve cover to get the grommet back out.  Once I was able to man handle the grommet into the valve cover with the fitting already installed I am very convinced that there won’t be a lack of seal from this point on as it was a mother to get in.  After getting the cover back on and the coils mounted back up it only took a few minutes to get everything situated and running again.

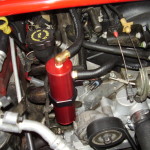
Here is a shot of the installed can.  I wish that the red had been a little brighter to match the car but overall I am happy with it and hope that this will prevent oil from getting into the TB and intake in the future.  The next step will be to pull the intake itself and let it soak in a degreaser bath.

Catch Can Installed


Case solved

It took several more days of investigation and another couple gallons of coolant but I was able to pinpoint the issue.  The leak was not always present so it involved frequently squeezing myself under the car with a flashlight a couple times a day.  It looks like the water pump seals were on the way out and hemorrhaging coolant from the weep hole when the seal was not doing it’s job.

Couple shots from under the car showing how bad it could sometimes be.

Oil Pan Underside of the front cover Water pump leak

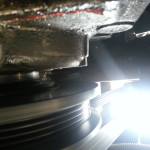
So I drained all the coolant out and yanked the pump.  Here you can see the wet spot under the impeller pulley where the coolant was coming out.

Water pump leak


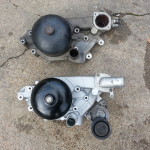
A side by side of the pumps.  All nice and shiny now.  That probably won’t last for long.  I considered putting in a 160* thermostat to run the engine cooler but decided to stick with a new stock 187* one for now.

Water pump comparison


I also picked up a flush kit and connected it to the water hose and one of the heater hoses since I have not had heat in this car since I bought it.  Not worrying about that sooner came back to bite me last week when we had all that rain and cold making it so I couldn’t defrost my windshield and could barely see to drive home some nights.  There was quite a bit of brown gunk and rust that came out of the heater core.  I was also able to see it built up inside the hoses.  Looks to be old Dex-Cool build up from when the previous owner went to running straight water and eventually green without flushing the system first causing the Dex-Cool to gel up when mixed with other coolants.  The core and hoses need replacing but that was not in the books for today but on the books for the future.  At least now I have heat and will be able to defrost when needed.  Also took the opportunity to ditch those damned spring clamps and replace them with worm clamps.  That will cut a decent amount of time and cursing off the project if I need to take the pump off again.


Case of the missing coolant

Today on the way home from work the Check Gauges light came on.  So the first thing that went through my mind was, “Time to feed the beast again”.  But no, I still had around half a tank so I did a quick glance around and my temp was about to red line.  I quickly pull over and shut off, hop out and take a gander under the hood.  I see a couple spots of what might have been anti-freeze but it was difficult to tell since it’s been raining non-stop for about a week now and everything stays wet.  I do a quick feel of all the coolant hoses and they are hot so I know that there is liquid moving through them but they did feel a bit lacking.

I hop back in the car and the temp had already gone back down into the norm.  Thought to myself WTF.  So I start her back up and start heading back down the interstate again only to have the same thing happen again maybe a mile down the road.  The temp gauge would go wildly back and forth while driving sometimes so I was beginning to think it might either be the sensor or the gauge itself.

I limp into a gas station and go to relieve the pressure in the cooling system to see if it actually is fluid related.  It boils over but only between 1-2 ounces.  Well, there’s you’re problem!  The rad was pretty empty.  So I head inside and get extorted by the station for $15 for a gallon of coolant and a small funnel.  It chugs down the entire gallon and still looks thirsty.

I button it up and get her started again.  The temp holds at the norm.  Good, so I hop in soaked with freezing rain and head back to the house.  No more issues at that point.  At home I was able to squeeze in about another 1/3 qt of coolant and let it run for a bit, it looks to be happy now but I will have to look at it some before heading to work in the morning.

Now I just need to find out why I was missing around 1/3 of my total coolant.  I have not seen any coolant leaks on my garage floor or anywhere else lately, just the normal PS fluid that I am already aware of leaking out.  Here is hoping that I don’t find it in my engine oil where I go to change that this weekend.

It’s the small things…

It’s always the small things that cause you the largest annoyances.  For example the other day I noticed that my driver side headlight was not coming all the way up so I pulled over into a lot to check it out.  You can just imagine my shock when I saw that the reason for this was that the edge of the hood was firmly wedged under the headlight.  I could not for the life of me imagine why this could be so I closed the lights to investigate.  The light was now most definitely resting higher than the edge of the hood.  I began cursing as I tried to think what could cause this to happen, someone trying to sit on the car that shouldn’t have, something heavy being knocked onto the car in a lot, ect.  After several minutes of fiddling around with trying to “re-adjust” both the corner of the hood and the light enclosure, I noticed something odd about a space on the supports.  There was an empty hole where the hood bumper support was supposed to be.  So, apparently it became fed up with this hard lived live and took a dive.  In addition this left a nice set of scratches in the paint along the front edge of the hood.  All this left me in the awkward position of having to pop the hood latch in order to turn my lights on and then having to walk around and then close the hood.

I went by the stealership the next day to inquire about getting a replacement and decided to just pickup a whole set for both trunk and hood since this is apparently the only part they don’t mark up 5000%.  Took them 4 days to finally get in what they claimed would be there the next morning so I swung by to pick them up.  Of course, like most other parts for these cars, it is not an exact match as they had changed the design.  This one being shorter than the original and I have to set it so that it is dangerously close to falling out in order to hold the hood in it’s proper place.  So a little more work will be required to get everything squared away.  Most likely something to pad the hood indention where the bumper meets so it doesn’t have to be so loosely connected.

Such a small, cheap thing to cause so much grief

Hood bumper


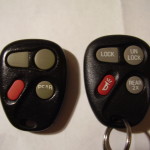
The next offender on the list is something we often take for granted, the key fob.  I only received a single key and fob when I bought the car a little over a year ago.  I’ve long since had some door, t-top and trunk keys cut so I would have a back up, but when you have the alarm set and use the door key it will still go off if you are not quick enough to put the ignition key in.  The trunk button on the fob never really worked in the first place but over the last couple of weeks it has been getting to where I would have to repeatedly push the buttons over and over using the edge of my nails to get them down as far as possible just to lock and unlock the doors.  Not fun in the rain.  I finally became fed up with messing around with cleaning the contacts, button pad and battery and just ordered a replacement.  It finally came in today and while I hated shelling out that kind of money for such a small and simplistic device, I am very glad I did.  I quickly programmed it to go with the car and now I barely even have to touch the buttons and they work flawlessly.

You can see a side by side of how worn out the old one is compared to the shiny new and functional unit

Key Fobs


The Sound of Music

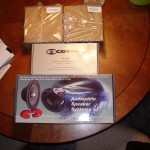
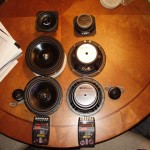
I’ve been dissatisfied with the way my stereo has sounded since I bought the car.  So as a holiday gift to myself I picked up some upgraded speakers from Kee Audio that would fit in the stock locations and run fine off the monsoon amp and head unit.  These consisted of:

  • CDT EU-61.2 6.5″ component speaker systems for the doors
  • CDT HD-6M DVC subwoofers for the sail panels
  • CDT CL-4EX 4″ coaxials for the rear hatch
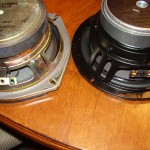
Here are a couple shots of the shiny new toys after UPS dropped them off.
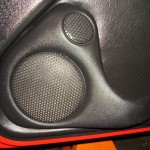
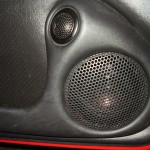
The install started off well enough with removing the first door panel and pulling out the old stock component speaker and getting the new one int it’s place.  The first problem I ran into however was that the new tweeter was not just a plug and play mounting solution.  After an hour or so of trying various things to get it mounted to the old bracket using the stock grill cover I got fed up and just used it’s flush mounting pod and some body trim tape to stick it to the stock bracket.  The only issue is that the new speaker is a little larger than the stock so the door panel was a little resistant to go back where it belonged.
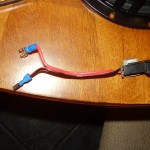
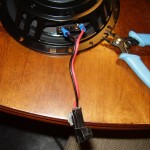
When pulling the old parts out it was nice to see GM was thoughtful enough to include wiring pigtails for each speaker.  They had however soldered the wires to the speaker terminals.  The new ones had prongs for slide on connectors so I just snipped the wires off the old speaker and crimped on some connectors so that I could re-use the stock pigtails.
That is where my night took a turn for the worse.  When I got to the back seat to replace the sail panel subs, this is what I was greeted by when pulling off the grill.
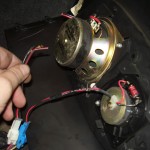
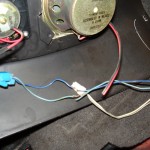
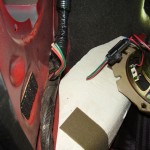
No wonder the sound quality was so crappy, there was no bass speaker.  The wiring harness was clipped off at the body panel with absolutely no slack in it at all.  What in the world possessed the previous owner to do something like this is beyond me.  Why would you not just unplug the pigtail instead of just cutting wires?  So, in order to fix this problem I had to start pulling body panels out of the car in order to get to the wiring harness.  With that situation out of the way I moved on to the others.  This is what I found.
The driver side hatch 4″ speaker had the wires also cut with what could only have been a butcher knife as the copper and plastic shielding was mangled, however the tweeter was left connected.  Again, no rhyme or reason that I could see.  Perhaps they did not understand how plug connectors worked?  In addition to that, GM had riveted these speakers to the body panels so that had to be drilled out.
Moving over to the passenger hatch speaker it was again more of the same.  With the exception that not only is the pigtail cut off but it was missing altogether.  So at least we now know that the last owner was capable of unplugging the connection, just too stupid to do so except when it could get lost.  And the tweeter wires look like they’ve been chewed on by rats or some other small rodents.
By the time I reached the other sail panel sub I was no longer surprised to see a mangled wiring harness.
So after many hours of cursing, removing & re-installing half the interior body panels and repairing all the wiring harnesses things are installed and running.  The sound system actually sounds good now that I am not getting everything out of the component door speakers.  I just have a rattle in one of the sail subs that I need to track down and correct along with finding another pigtail for that hatch speaker or finding the correct plug to make one of my own.
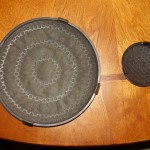
When I was putting everything back together I also decided to alter the stock grills a little as well.  From the factory they had a felt backing on them that obscured the speakers from view.
I ripped out all the felt I could then sanded away the rest that was glued on and then re-installed them.
Over all I am much happier with the sound system now.  Maybe I’ll start saving and shopping for a new head unit & amp sometime in the near future to round it out.  Maybe a stealth sub box in the back hatch area.