Author Archives: Chris

Cam Swap – Day 5

So I got back to work on the car today after a little break at the end of last week.  What was supposed to be an extended weekend project is starting to look like what could be a month long ordeal.  I fought for days trying to swap out the valve springs while everything was in the car.  First using one tool from an LS1Tech forum member then another, outlandishly expensive, one from Comp Cams.  They both work fantastically for removing the old parts but when it came to trying to align the valve stems in the center of the retainers to put the new locks on, it was next to impossible.  In 2 days time I was able to remove four springs and install only two.  That was when I got fed up with tightening down the tool dozens of times with nothing to show for it.  So I decided to just pull the heads and do the work on a bench.  I keep creating all this additional work for myself.  I will say this though, anything to do with those damned heads in the future will see me pulling the engine.

I started today by pulling the intake manifold which wasn’t all that bad until I tried to disconnect the fuel line from the rails.  It didn’t want anything to do with that.  Tried for a couple hours with the supposedly quick disconnect tools that are the plastic disks that you put around the line and push them in to release the springs.  That was a huge waste of time and frustration.  After two different kits of the plastic rings I found a disconnect tool that was a couple pieces of metal held together my a rubber band.  Tossed it on the line and 1.6 seconds later it was disconnected.  Time to move on.

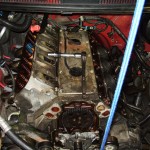
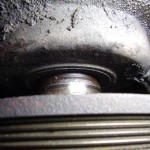
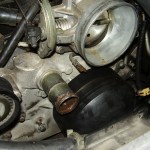
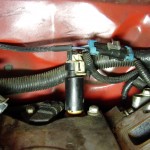
After removing the intake I was greeted by this lovely sight.

My oil pressure sending unit was broken off where it meets the threads.  That would explain some of the unusual oil pressure readings I have seen at idle.  Probably a source of oil leakage as well.  Yay for having to spend more money.

Had to remove the exhaust yet again so that the headers could be moved around around to get to the head bolts.  That’s one part of the car I am getting tired of working on.  Maybe when I put everything back together I will drive around with open headers for a while before putting the duals back on.

So when I went to remove the driver’s side head, yet another problem jumped up and smacked me in the face.  When I installed the headers in the spring I put in ARP header studs instead of re-using the bolts.  While this made it super easy to install the headers by being able to just hang the gasket and the header itself while being able to take my time to thread the nuts on, it created a problem for head removal.  As it turns out 2 of the studs are in the way of the flared bolt head and stop it from coming more than half way out.  So with the header flange sitting all in the way in what little open space there was, I had to take on the painstaking task of using 3 fingers and a small allen wrench to remove the studs at the rate of about 1/8th of a turn at a time.  At least I now know before hand for the other side and it won’t be so painful.

So with the head off I took a quick snap of all the space I now have available in the engine bay.  Probably not something I’ll ever seen again.

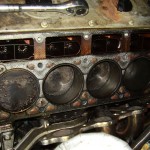
And here is a shot of the driver’s bank of cylinders.  You can see some serious carbon buildup on the #1 cylinder where it has been burning oil.  There is some buildup on the other cylinders but nowhere as bad as this one.  You can also see several spots on the worn out graphite gasket where it has rotten away over the channels in the water jacket.  This is most likely where I am getting coolant in my oil at.  I suppose one way to look at this in a positive light would be that the head gaskets were in sore need of replacing anyway.  I will be using some MLS ones when I put it back together instead of the graphite POS.

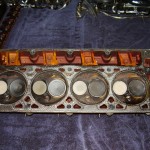
Here is a look at the combustion chambers on the head.  It seems odd that only the intake valves have carbon scoring on them.  You can also still see wet oil in more than one of the chambers.  That gasket had to be doing next to nothing for a seal.

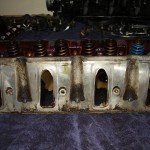
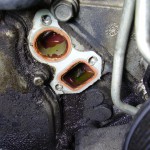
Here is another place where oil was getting where it should not be.  These are the intake ports from the manifold.  You can see a good amount of burnt oil here as well.  Of course this could also be related to the crap PCV system in the LS1s that was corrected with the LS6.

Not sure how much work I will get done on it tomorrow since I have to travel a little in the afternoon to give an employee meeting and won’t get back until later in the night.  However once I pull the other head and get the springs on I will probably go get several cans of brake cleaner and tidy up the heads, cylinders and block some so it isn’t so nasty looking with crud all over the place.  It will be some busy work while the new head gaskets, bolts and sending unit are shipped.  I would love to install some head studs but ARP wants in the neighborhood of $350 for them.  Too bad I hadn’t planned on going this deep into the engine or I could have planned for more to be done such as the LS6 intake and PCV system.  Other than that, my hands look like I’ve been in a fist fight with some razor wire.  Some wounds are starting to heal already, that’s a sign this is taking too long.  Slowly but surely it will get gone though.  I am hoping no more than a week and that I don’t find any more problems.

With the shape some of this stuff is in, I don’t know if it is really worth doing much else to the engine.  Maybe I’ll start saving up for an LS2 or LS3 longblock to swap in at some point.
Cam Swap – Addendum

So I messaged the creator of the spring tool this morning and he told me is was working as intended.  Bending before any harm can come of the important parts.  He told me to bend it back and try again.   I told him ok.  My arbor press wasn’t enough so I smacked it with a hammer until it was flat again.  I was able to mount up the second spring ok.  I moved on to another cylinder however and was able to remove items just fine.  The fault in this tool is trying to line up the valve stem to get the new set of locks on it.  It is horrible to tighten and loosen the spring a dozen times just trying to center something that should be mostly non-interactive.  I never could after 2-3 hours get a third cylinder to line up enough to put the locks in. So I am glad I did not cancel the order of the other tool after getting that one lucky strike this morning.  I will report the failing to the tool maker whom I assume will claim it is all my fault somehow and his tool is perfect and get no recompensation.

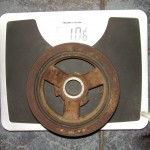
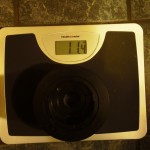
Other than that, my new UDP came in today.  After feeling the box I became curious and looked further into it and yes, it is definitely heavier than the stock pulley.  This will be overcome and then some by the reduction in rotational mass the crank will have to spin.  So while it is a heavier pulley it will gain in the long run.  Not to mention it has nice high walls so the belts can’t try to jump on me.

Old Pulley:

And here is the new one:

You can also see how much smaller the new one is.

The new spring tool should be here on friday.  I hope to have this mess corrected by then.

Cam Swap – Day 4

Yesterday was just a complete and utter bust.  Next to no progress was made at all.  I spent a good portion of the day just trying to use my air compressor to pressurize the cylinders so the valves wouldn’t drop when I pulled the springs but could never get it to hold air properly.  So I am going to give the TDC method a try and hope I have it at the top of the stroke when I pull the springs because I really don’t want to pull the heads if I don’t have to.  I managed to swap one whole spring, seat and seal then remove another before things went FUBAR.

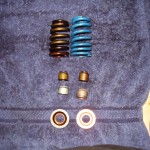
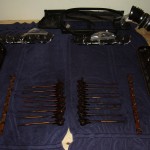
Here is a shot of the old valvetrain next to the new.  The spring is noticeably larger, the seals are of course the same and the seat is made out of copper where the old one looks to be hardened steel.  Not sure why this is other than to loose a little weight perhaps.

And this is the reason why I only got one swap completed.  The compressor tool I was using took a dump on me and decided to bend.  After that I couldn’t get it to compress the spring straight down so the valve stem was always too close to one of the retainer edges to fit the locks on.  Guess that is what I get for trying to save some money on specialty tools.  It was made by one of the tech members and seemed like a solid piece.  Maybe I can get something back for it being defective or whatever but I won’t hold my breath.  In the meantime I ordered the Comp Cams LS tool which I should have done in the first place.  Hopefully it gets here friday rather than monday.

Cam Swap – Day 3

The pulley war is finally over and I was victorious!  Since the stock bolt was barely threaded into the crank by maybe 2 threads at best I spent a good amount of time driving all over town in search of a longer bolt.  It is not an easy task to find an M16-2.0x120mm bolt.  But finally at the sixth place I went to, I struck gold.  Came home and made that pulley my bitch.  Since I broke off part of the stock pulley I was a little concerned that it would effect the balance so ordered a 25% underdrive replacement that should be here on Wed.

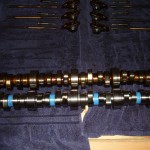
Once the pulley was off, it was smooth sailing to get the old cam out and the new one installed.  Here is a shot of them side by side.  As you can see the new cam is not a huge change over the stock but there are some noticeable differences in the lobe shapes.

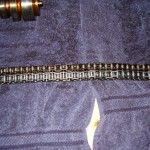
Installing the new timing chain was cake as well, just tossed it onto the gear.  This of course was the easy part of the timing change.  Here are the two chains, the LS2 replacement being a good bit beefier than stock.

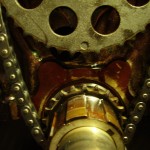
Here is where the fun started.  Lining up the timing indicators on the gears was a pain in the ass since you have to align the dowel pin on the cam with the guide on the gear while also aligning the timing dots and keeping the chain taunt.  And if you don’t get the dowel pin in just the exact right spot it pushes the cam into the block at which time you have to put everything down and pull the cam back out again then start all over.  Took about 20 minutes but I finally got it all done.

The truly fun part of the night was replacing the oil pump.  I swear on all that is holy that I will never replace the oil pump on an LS motor while it is in the car again.  At least not without dropping the K-member.  This was a colossal pain in my ass.  Unfortunately with these LS1 F-Bodies you can not drop the oil pan without at least partially disassembling the K-Member.  So the best I could hope for was to loosen the bolts and let it drop about half an inch.  That in itself was a time consuming process as there was a couple of the bolts directly over the K-member and it took hours with a small 10mm box wrench to loosen and later tighten them back up in a space I could barely slide half my hand into.  But that was the easy part of the task.  The oil pickup tube has a bolt that holds it to the pump and is behind the lip of the pan so there just is no easy way to get it back in there without a great risk of just dropping it into the pan and causing no end of misery.  It took a great deal of patience and a cleverly re-purposed bread twist tie to get the bolt down behind the pan lip and back up into the pickup tube where it belonged.  I am crossing my fingers that the o-ring did not get pinched during this as I will be beyond livid if I have to tear all this down and re-seat that pump again.  I forgot to snap a shot of the pumps before I installed it but they were nearly identical with the exception that the new one was ported for better flow and better internals.

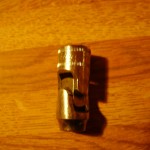
I did come across one oddity while changing the oil pump.  I found this wedged between the rack and k-member.  Free Snap-On tool.

Tomorrow will be valve springs and seals.  Should be a fairly easy day.

Cam Swap – Day 2

The war of attrition against the crank pulley continues.  The outlook is grim.

So today I started out once again trying to get the crank pulley removed.  I made some decent progress and have it about 95% of the way now.  That is the good news.

The bad news is that I have now broken 3 pulley pullers trying to get it the rest of the way out.  The first 2 pullers were the cheap harbor freight ones which first stripped out all the threads getting the pulley to this point.  The second puller popped a head off one of the arm bolts.  After this I went to Advanced Auto and picked up an Autocraft heavy duty puller.  I was back in the store 20 minutes later to return it since one arm failed by a bolt shearing right through it and another of the arms bending.  Heavy duty my ass.  So they refunded me and I rented their Powerbuilt Kit #43 puller.  I’m loving this one, they might not get it back.  So I hook up the uber puller and start to cranking on it and there is a large pop which is never a good sign.  I inspect the puller and no damage.  I thought I had killed the unkillable puller.  No, instead the puller did it’s job too well and snapped one of the tabs off the inner wheel of the pulley that is used for the pullers to grab on to.

So at this point I am not sure what to do about getting this pulley off since there are only 2 out of 3 places for the puller to grab onto now.  I suppose I could try pulling from the outside of the pulley but that would damage it and it would then need to be replaced.  Maybe this is the engine telling me that it wants to be upgraded to an Underdrive pulley.  I think a longer crank bolt might help resolve this as well since the stock one cuts it very close.  I’m warning the engine though, don’t make me get a torch and sledge.

Cam Swap – Day 1

So I decided to start on the cam swap today and hopefully can have it completed before the weekend is done.  It started out pretty smoothly and I was able to get the coilpacks, valve covers, rocker arms, rail, and pushrods out without any trouble.

Here is the crusty old valvetrain.

Surprisingly none of the pushrods appeared bent since that is a very common issue with the stock parts.  Everything had heavy carbon buildup though and I thought about cleaning them up some but decided not to invest that much time into it.  I’ll take care of that when I install some new heads later down the road.

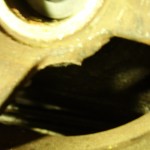
Removing the water pump was a little more of a challenge.  Once the belt was out of the way I went to disconnect the metric ton of hoses and ended up tearing a hole in the upper radiator hose.  Fortunately I was able to get someone to drive me around and found an Advanced Auto that had one in stock.  Once all the bolts were out the pump decided it liked where it was and didn’t want to leave.  I ended up having to use my breaker bar as a pry to break the seal.  After I had it out, something in one of the coolant channels caught my eye.

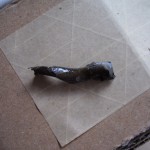
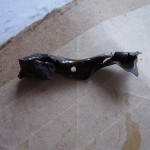
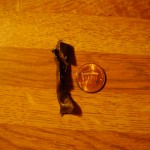
If you look in the lower opening there is a strange chunk of something.  After working with some needlenose plies I was able to get it out and this is what it was.

I have no idea what this chunk of metal used to be or where it came from but it was definitely not healthy for the system.  I am hoping that it isn’t a part of the water pump as I don’t need any additional costs at this point.  With it out, the coolant should definitely have a better flow now.  The radiator was a bear to get out as well.  The A/C condenser is connected in front of it by these 4 slide tabs that you can’t see and have to just keep lifting the radiator up and moving it around until they are disconnected.  I can’t even imagine what kind of fun that will be putting back together.  But once it and the pump were off I had copious amounts of antifreeze from the hoses and such dump about a gallon all over my garage floor.

Next I dropped the starter and put in a flywheel locking tool to keep it in place so I can remove the dampener.  After much effort and actually climbing on top of the engine I was able to break the massive dampener bolt loose.  After fighting with my various pulley pullers I was able to get one locked onto the wheel and began to tighten it and managed to break the only 14mm wrench I have.  I tried the closest SAE size of 9/16 and it started to round off the puller screw so I put a halt on that.  Tomorrow I’ll have to see if I can get a ride to find a heavy duty wrench to get that sucker off.  It’s definitely not wanting to move.  Might need to take a torch to it if nothing else.

That pretty much put a halt to the progress since I can’t do anything else until the dampener is out of the way.  I did take the time to go ahead and install the trunion upgrade kit in the rocker arms so that burned some time and is one less thing I need to do when putting everything back together.  By that point I was too tired to deal with replacing the springs and will deal with that later.

On a side note, this is what I found when pulling off the hose to the throttle body coolant line.  I can’t imagine why this would have happened unless the asshat who had the car before me was cheaping out and running tap water in the coolant system.

Maybe I can use that as an excuse to get a new throttle body 🙂  Anyway, I hope tomorrow goes better with the dampener and I can get this show on the road.

Almost there

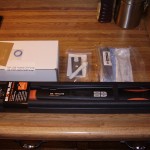
Got back into town tonight from a trip to San Antonio and had some more goodies waiting for me to do the upcoming cam swap.

  • LS6 Ported oil pump and new O-ring from TSP
  • Spring compression tool made by one of the LS1Tech members that allows me to do spring replacement without removing the heads
  • LS2 timing chain
  • New digital torque wrench from Brownline Metalworks

All I need now is a set of valve stem seals, some small odds and ends and it will be on like donkey kong.

New wheels

Replaced the stock wheels and tires today with the Torq Thrust M from American Racing. Decided to go with a staggered setup so the rears are wider than the fronts.

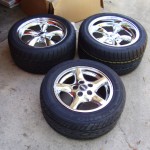
Here is a shot of the stock setup compared to the new ones:

At the bottom is the stock 16″ wheel  running Kumho Ecsta AST 245/50.  Top left is the new 17×9 front running Nitto NT555 275/40 and upper right is the new 17×10.5 rear running Nitto NT555 315/35

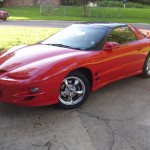
Here is a shot after mounting them up

New Exhaust

This past weekend I ended up swapping my entire exhaust post headers.  I have been running for the past 2.5 months with an ORY and I believed I could get past the rasp.  I was wrong.


More cam swap parts and some maintenance

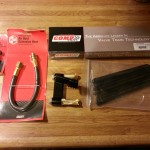
Have more parts for the upcoming cam swap.  Just a few more pieces to go and I’ll be ready.

  • KD Tools cylinder compression fittings and extension hose
  • Flywheel locking tool courtesy of Gray86hatch on LS1tech.com
  • Comp Cams trunion upgrade kit
  • Manley hardened pushrods

I also did some maintenance by seafoaming the car.  Filled up the tank and dropped a can of seafoam in it to give the injectors a cleaning.  Then dropped half a can in the crankcase and drove around for about 150 miles to get it breaking down some of the sludge built up from the last 133K miles.  Put the other half can into the brake booster vacuum line to get some coverage in the cylinders and let it sit for a while.  In the meantime I soaked down the throttle body and intake manifold with some seafoam deep creep to get it in all the hard to reach spots.  Changed the oil and fuel filter and took it for a “spirited” drive.  It looked like a smoke screen from a spy car as I hammered it down the highway.