Author Archives: Chris

New air lid and tire woes

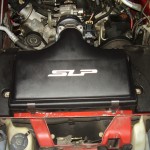
FedEx dropped off my new airbox lid today and I quickly got it installed along with spraying the MAF with copious amounts of cleaner.  I doubt it has ever been cleaned in it’s life considering some of the things I found within the air system between the airbox and MAF screen.  Also popped in a fresh filter for good measure.  Drove it around for a little bit and it already seems more responsive with a bit more pep.

Also topped off the gas tank and dropped in a bottle of seafoam to give the injectors a good cleaning.  I’ll later be adding some seafoam to the crankcase as well to give the internals a good cleaning to breakup and get rid of 133K miles of buildup and sludge.  Want to get it in as good shape as I can for the cam install in a couple months.

On another note, yesterday being friday the 13th bad news never fails to happen.  It was nothing major thankfully.  I had to have a new tire put on a couple weeks ago because the radials inside had decided to separate from the rest of the tire and caused it to start pulling hard to the right and giving a terrible vibration.  So over the last week the new tire has gone flat more than once.  So after bringing it back to the shop and letting them investigate, the problem is that the chrome is just destroyed on the interior of the rim with large pieces just missing and others peeling.  This is causing it to not seal properly and is perpetually leaking.  Whatever fool owned the car before me made a habit of pumping the tire full of fix a flat.  As much of the inner rim was ground down as could be and they put on a heavy layer of sealant before remounting the tire.  Hopefully it will hold a little better but the only thing to do is replace the wheel.  I would hate to spend hundreds on an OEM replacement when I was wanting to get new wheels within the next year anyway.  I’ll have to try and keep it aired up and hope that it will last a bit longer or else I might have to figure out a way to push up the new wheel purchase.
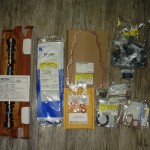
New toys for the bird

While I was in Atlanta this past weekend, the friend whom I was staying with noted that he still had some parts from back in the day when he had an 02 Camaro Z28 that were never installed.  The parts consisted of:

  • GMPP “HOT” Cam – 218/227 @.050 .525/.525 112LSA
  • 2x Valve cover gaskets
  • 2x Water pump gaskets
  • 16x LS “Blue” valve springs
  • 16x Valve spring locks
  • 16x LS6 valve spring seats
  • New crank bolt
  • Crank seal
  • Timing cover gasket

While neither of us really knew the value of cam technology over a decade old, I made a blind suggestion of $125 and he agreed to it.  While there have been great strides made in cam lobe technology since the days when this or the ASA was king for LS1 engines, you can’t beat the value of what I paid for the gains in HP.  Not to mention that low LSA will give it a nasty lope on idle.  Other great things about this cam is that it has such a low lift that stock LS6 springs work great for long valve train life, the stock push rods don’t have to be replaced and the stock torque converter can stay in place.

There are still several things I will need to pick up before I can make the swap though and unfortunately they will cost about 4 times what I paid for the parts I have.

  • Comp Cams LSx Valve Spring Compressor Tool
  • Kent-Moore Flywheel Locking Tool
  • Valve Stem Seals for both intake and exhaust
  • Valve Spring Retainers
  • LS2 timing chain
  • Ported LS6 Oil Pump
  • Cylinder Leak-Down testing kit
  • 3 Arm Pulley Puller

A third of that cost will be the new oil pump which I could probably get away with not replacing but since I will be in there replacing the chain already, I might as well upgrade that at the same time.  Can’t wait to gather it all up and start the work.

A couple more minor fixes

Scratched off a couple of the more minor items that needed to be fixed from the mile long list of issues the bird has.  Had been wanting to attend to these for a while now but made them more of a priority in order to make a trip to Atlanta to visit some friends this past weekend.

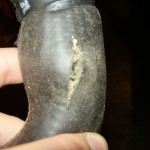
The first was a split upper radiator hose that I noticed some time back.  At the time it wasn’t an issue as there wasn’t a leak present but it finally broke through the inner wall of the hose and began spraying coolant all over the engine bay.  No auto part place in town carried them and wanted in the neighborhood of $40 or so to order one.  So instead I picked up a generic hose with the approximate bend angle and cut it down to size.  Now back in running condition with no more leaks.

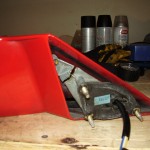
Next was an issue with the side mirror that has been bugging me since the day I bought the car last fall.  The driver’s side mirror had a good deal of excess give and vibrated badly when driving around making it difficult to use.  Pulled it off and this is what I found.

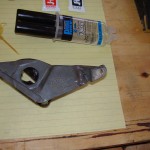
Well there’s your problem!  The mounting bracket had snapped clean in two.  Being the kludger that I am, replacement wasn’t even part of the equation.  So I pulled it apart, cleaned it up a bit and began my repair.  First I filed the edges of the break a bit to roughen up the surface for better adhesion and used a 5 Minute epoxy to get the pieces back together.  I then slathered on a thick bead of JB Weld around the break and let it set over night.  The end result looked promising.

So far it has survived 6 days and an 800 mile drive to Atlanta and back with no signs of it failing.  I’d say kludge successful  Unfortunately on my way to Atlanta an issue popped up with the car that is causing it to pull to the right a good more than I am comfortable with and some vibration in the steering.  I’ll have to bring it by a shop soon to have balance and alignment checked since I don’t have the equipment to do that myself.  If it isn’t once thing it’s always another.

LED DRL/Turn Signals Installed

I finally got around to installing the LEDs into the car.  I’d like to say it went smoothly but nothing ever does.

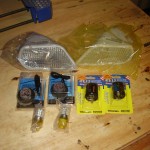
Here is all the materials needed to make the switch.  New housings, sockets, electronic flashers and LED bulbs

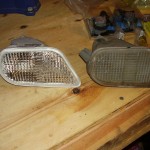
Here is a comparison of the new housings compared to the ones I was taking out.  12 years on the road is harsh to plastic lenses.  Especially when they lose seal/crack and allow water to get in.

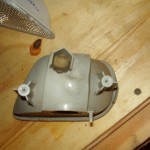
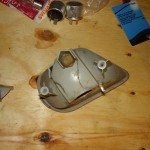
Here are some other shots of the passenger housing.  From the top you can see the large discolored spot where the incandescent bulbs had melted the plastic of the housing and caused it to warp.  You can also see a similar spot on the back side.

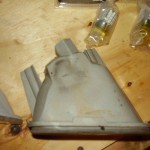
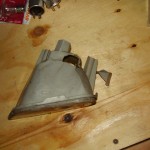
Here are some snaps of the driver side housing.  It was a bit worse for wear as it began to literally fall apart as I removed it.  From the top you can see the huge chunk that just fell from the housing as I pulled it out along with some large dark cracks.  Also from the back here you can see more of the large cracks.  These were letting massive amounts of water in and would blow the bulbs the first rain after I replaced them.  This one actually dumped water all over my head as I pulled the socket.

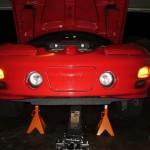
Here is a nice shot of how bright and clear the new lights are.

There is still a problem I need to track down and fix though.  The passenger side isn’t blinking when I put on the turn signal or hazards.  I am hoping it is just a simple wiring issue otherwise it could be the DRL Module or the gauge cluster causing the problem.  But that is enough working on it for tonight.

Finally finished with the exhaust

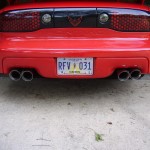
So I finally wrapped up everything with the exhaust install today by having the tips welded on.  While there they noticed that the Y to I pipe connection wasn’t really sealing well so we decided to weld that up too.  Here is a shot of the new tips.

The install itself wasn’t really all that terrible.  I had read many horror stories about being able to get the headers in.  Once I had gotten all of the old exhaust out, courtesy of my reciprocating saw and alot of cursing about tight spaces, the new headers slipped into place fairly easily.  The only except was having to remove the oil filter for the driver’s side to make it in.  The studs helped a great deal by allowing the gasket to hang in place and as a guide for the header.  I imagine doing it with bolts would have been a much greater chore.  Here are a couple quick snaps of them after the install.

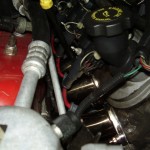
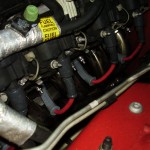
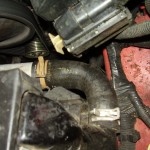
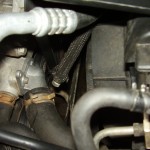
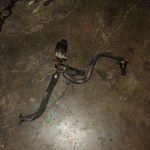
Unfortunately I did discover a couple other issues during the install, but nothing that was major.  Here is one of the coolant system lines that wasn’t as noticeable until the airbox was off.

And also hiding under the airbox was the capped off end to the coolant line that runs through the throttle body which is then supposed to return to the radiator.  Apparently some redneck shade tree mechanic “fixed” this by shoving a bolt into the hose and clamping it down when he installed a radiator that obviously wasn’t meant for the car since it didn’t have a provision for this line.

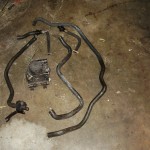
I was also able to clear up a good bit of space in the bay by removing a couple of the stock systems that I no longer needed.  Here is the AIR system that was used to inject air drawn from the airbox into the cats until they hit operating temperatures.  See ya!

And here is the EGR system that grabbed hot unburnt gases and shoved them back into the intake right behind the throttle body.  It not only blocked incoming airflow by having this huge dong sticking into the intake but to inject hot as hell air right back into the intake?  So long sucker!

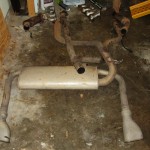
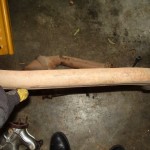
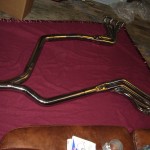
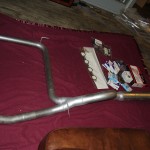
Here is a snap of the shoddy stock exhaust system and a side view of the stock Y pipe.  You can see why this was a severe choke point on these cars and killed a lot of their power right out the door.  A slight bit more clearance from squashing the pipe like that is most certainly not worth it.

I decided not to do the poly motor and trans mounts during the install because I was just too worn out to deal with them at the time.  I’m going to hold onto the parts and take care of it when I do the heads since the car will be down for an extended period of time for those most likely.  I will say that ham fisted big folk like myself were never meant to work on some aspects of these cars.  Especially with the say they slanted the plugs in the heads.  I can barely get my hands to the back of the head to just touch a plug on the passenger side much less maneuver the wires which take a bit of force to get on.  All in all, it took about 10-12 hours of work to accomplish.  This was with a few hours of breaks scattered in when getting too frustrated.  I am loving the new sound and increased power in the mid to high rpm bands.  Now to save up for some spiffy new wheels and tires.

Finally

The last part finally arrived today after multiple calls to TSP and them calling ARP.  All the guys I spoke with at TSP were great and tried to be as helpful as possible.  The asshat from ARP however wouldn’t give any info other than, “it shipped sometime last week”.  Refused to give a tracking number or anything helpful.  Now, I just need to pick up a few odds & ends then can begin the install projects this weekend.

Shiny!

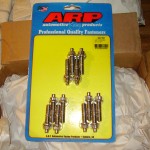
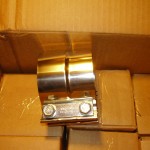
FedEx dropped off a box full of shiny goodness this morning in the form of stainless steel preformed band clamps for the exhaust install next week.  Now, if only my ARP header studs would show up.

MAF Mess

Pulled apart the air box today to see about hacking a few pieces out to increase the airflow and decided to check on the MAF at the same time.  Holy moly.  When I pulled the MAF out it had a good third of the screen covered with debris.  Dried grass, what looked like seeds, bird feathers and who knows what else all that was.  Also the screen was covered in what looked to be soot or carbon residue.  How all that got past the air filter is beyond me.  Cleaned it all up and took it for a drive.  It seems to have a much snappier response now that it is able to breath a little better.  And to think there is a large following out there that advise everyone to de-screen their MAF.  No thanks, I prefer not having foreign material in my engine.

Exhaust arrived

UPS finally dropped off the rest of the items I’ve been waiting on for the past month from TSP.

  • 1-7/8″ Stainless Steel Longtube headers
  • Stainless Steel ORY
  • Rumbler catback
  • MSD 8.5mm plug wires
  • Set of NGK TR55IX plugs
  • Pair of oem metal header gaskets
  • O2 extensions
  • Whole pile of clamps

Unfortunately I probably will have to wait a bit to install everything since we are at the end of tax season and taking a day or 2 off isn’t as easy as it would have been had I gotten them a few weeks ago.


Finally had the time…

Ok, so last night I started to break down the diff on the car to fix the terrible leak I created from last week.  I know it was not a good thing to go going through all that oil but I did not expect the problems I did.

I ended up spending about 6-8 hours with a putty knife as that was the only way I could find to get the old gasket off.  Of course GM hates people with large hands so I had to drop one side of the pan hard.  the other was too dependent on the spring seating for me to worry about.  So with much more arm room to work with I was able to finally get all that freaking paper gasket off, even though it took forever.

I smeared a light coating of high temp RTV on each side of the gasket so it should not only make a good seal but be easy to clean if anyone other than myself has to do it.