Category Archives: Uncategorized

Heads are back

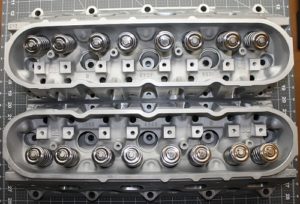
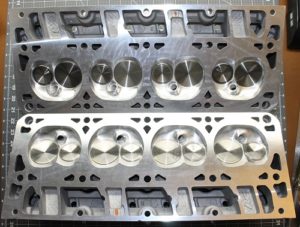
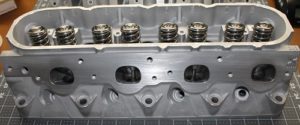
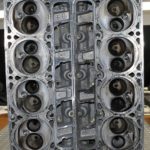
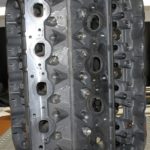
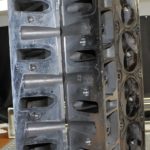
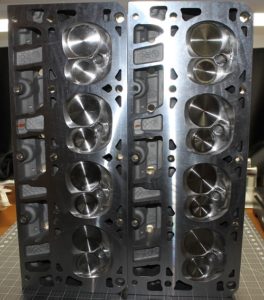
The heads have come back from TEA and they are looking nice.  It will probably be a couple weeks or so before I will be able to begin the tear down and install of the new toys.  I can’t wait to get everything in and see what kind of oomph she is going to have afterwards.


New toys

So it has been a while since I have done any updates.  Nothing has changed on the ‘ol ‘bird since then upgrade wise.  Though it is currently having some really odd electrical issues where the tail lights are intermittently working properly.  So I am not really able to drive her much until I get that sorted out.

But on the plus side I did get some new toys for her that will put a little more pep in the step.

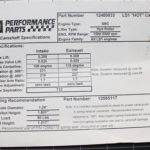
First being a new camshaft.  The current one is the old tech GMPP “HOT” cam specced out at 218/228 with a 0.525 max lift.  The new cam will be 230/234 112+2 at a bit over 0.6 lift.  That should wake the ole girl up some.


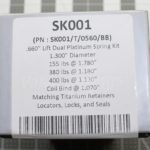
Next is a shiny new set of dual springs care of Brian Tooley Racing.  Specifically their .660 lift platinum kit.


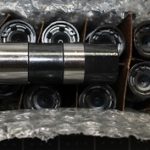
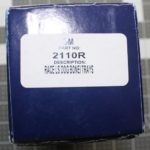
Another upgrade happening while I happen to be in there is the lifters.  Instead of going with some stock level replacements I opted for some Johnson 2110R short travel lifters.  I will have to measure for new pushrods once the heads are back on but overall they should be an improvement.


On top of all that I have sent off a pair of 243 heads off to Total Engine Airflow for their stage 2 porting service.  I can’t wait to get them back and get all this installed in the ole girl.  I had a set of 243s a couple years ago but sold them thinking I was going to build a stroked 408 or 418 but the funds were never there for it.  So I am settling for what I can do with the LS1 for now.  Regardless, she should run quick after this.  Assuming I don’t grenade the rear end.  Though still having the 3.23 A4 gears in the rear after the M6 swap will help prevent that for a while until I can save up for the S60.


Will post some pictures of the heads once they come back from TEA.

Charging system maintenance

So the bird has been having this terribly intermittent charging issue over about the past year or so.  I could be cruising down the road and all of a sudden the voltmeter goes from 13+ volts to 8.  It doesn’t kill the car, just hangs out at 8 and keeps it running as long as I want with it sometimes ramping back up to the 13+ volts.  I had just assumed it was the PS leaking and killing yet another alternator.  So a while back I ordered a nice Powermaster alt with the relocation kit to move it into the old EGR spot courtesy of CBR Performace located right in my home state.

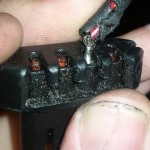
So this morning I go to do some prep work on the mod by installing a new alt pigtail since I couldn’t complete the job until I go to get a new sized belt and since this is my DD for the most part I couldn’t tear apart stuff I can’t fix the same day.  And I figured that if I am going to go through all the trouble of relocating the alternator and re-wiring the exiter wire that I might as well freshen the olug since it is bound to be coated with PS fluid.  When I get down there and drop the alt, I noticed something that I never caught before despite the numerous times I’ve had the alt off.  Someone has already spiced in a replacement exiter pigtail before I bought the car.  And man was it a hack job.  It was a crimp only job which is pretty much fine, I just prefer solder and heatshrink myself.  But the replacement pigtail was 12GA wire where the original is 18GA so there was a change in resistance along the path to the alt which could be causing it’s own issues.

Alt exiter wire 1

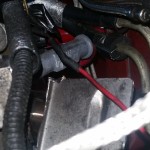
And then I took a closer look at the plug itself and it is a wonder that it was charging at all.  This is what it looked like.  It also had about an eighth of an inch play in and out of the weather pack.

Alt exiter wire 2

So as a stop gap, and to get the car running right again, I just snipped off the end, stripped both sides, fluxed and soldered them together.  Unfortunately my heat gun is at one of my offices so I had to try and use a hair dryer to shrink the wrap, eventually I was satisfied with the shrinkage.  Another crap point I found when putting in the new pigtail is that the 12GA wire that was used in the previous spice was aluminum and not copper so that was another negative.  I haven’t had a chance to test drive it yet put as soon as I put the battery back in to back it off the ramps it was immediately back up to 13+ volts so I think this will hold until I have the time to relocate the alt itself and put the new unit in.

Air Compressor TLC

While not directly related to the bird, care of the garage’s air compressor is essential.  It is, after all, the source of power for many things such as tools, filling tires, media blasting, ect.  So I decided to take some time and do a little TLC on it tonight.

When I picked it up, the previous owner had already changed out the stock petcock drain valve with a 90* elbow and a couple of pipe nipples to make draining the tank easier.  That is where the good ends.

I wouldn’t so much as say I purchased this compressor from the previous owner so much as I rescued it from him.  The sad part is that he was only getting rid of this one because he replaced it with an exact unit for tax purposes.  I feel for that new unit.

It looks like the pieces he used are galvanized.  While at the bottom of the tank where sediment and water collects aren’t all that important but when there is a large air discharge it will still stir things up and possibly bring junk into the airflow when rust flakes off.  When I first brought the compressor home I opened his makeshift drain and ended up with about a cup of water that was heavy with rust flakes.  So I am not really sure how often he made use of the drain.  But the large rust chunks indicate that water sat in the tank for a pretty good while.  I try to drain the tank regularly but sometimes with the workload doing etchings it can be difficult to take a couple hours to bleed off the air, drain the water, re-pressurize the tank then let the motor cool off.

While this drain is much more convenient than the stock petcock, it was still a pain since all he did was cap the nipple off.  So I had to grab the channel locks every time and twist it off.  Sometimes the cap would come off, other times the long nipple pipe would come out of the elbow.  None of it was sealed well.  Water would weep out from pretty much every joint and stay damp.

Today I decided to take some time and fix a bit of it.  I was going to just replace the entire fixture with a brass setup but I couldn’t really access the elbow to remove it due to the compressor sitting on a mini wood pallet and maneuvering tools under there was difficult.  The replacement will have to wait until later as this had to be a quick patch so I could have it up and running again.

When I pulled the pipe nipples off I discovered why it had crappy sealing.  This champ had used masking tape as a thread sealer, when he used sealer at all.  That’s right, your run of the mill paper adhesive tape.  I am sure the elbow is done the same way but there isn’t anything I can do about that at the moment.

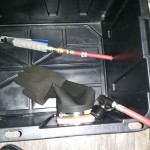
Here is the drain as I got it.
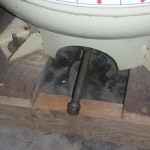
Air Compressor Old Drain

And the awesome thread sealer the winner of a previous owner used.
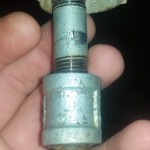
Air Compressor Tape Sealant

So I pulled all the pieces apart and there was crud built up in the pipe that looked like freaking black death.  When running a wire brush through in an attempt to clean them out some it was a literal black mud that was coming out.  Looking through the pipe there was evidence of corrosion all over the place.  I’ll have to pull the cherry picker out of the storage shop sometime soon so I can support this heavy beast to take it off the pallet and fix this properly.

I ended up flipping the nipples around in arrangement so the longer one went to the elbow.  I also made sure to put a few extra wraps of PTFE around the threads to make sure it sealed well and cranked everything down tight.  I then replaced the end cap with a 1/4″ full turn ball valve and barbed fitting.  This way I never have to empty the tank again, I can just open the valve and let the 150PSI push all the water and junk right out of the tank in a couple seconds instead of a feeble gravity drain.  I still need to pick up some tubing to run from the barbed fitting to outside the garage so it doesn’t make a mess.

Here is the new setup as it sits now.
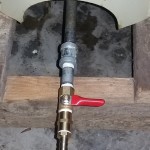
Air Compressor New Drain

Now… if only I could find some time to work on any number of the car projects piling up.


Filler Decal

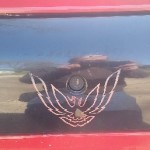
Nothing major today.  I just got tired of seeing the faded, mostly missing logo on the rear filler panel.  So I made up and cut a replacement decal to put in it’s place.  It wasn’t quite the right size but close enough so that no one will really notice.

Before:

Trans Am filler panel before

After:

Trans Am filler panel after


Second Christmases

It’s been a while since I’ve updated the site.  The bird started developing charging issues again in late spring/early summer.  So figuring it was the PS pump killing another alternator I parked her up until I had some time to work on it.  Well, those couple weeks turned into a couple months and ended up being about 6-8 months the poor thing has just sat in the driveway.  Not even in the comfort of her garage, I am such a neglectful owner.

The original plan was to rip out the PS pump and loop the rack until I could afford to get my hands on a properly geared manual rack.  After some going back and forth on it and talking to some of the guys on the boards, I decided to keep the PS for now and instead relocate the alternator to another part of the motor.  This means I will need to move my catch can to somewhere else, but that shouldn’t be an issue at all.

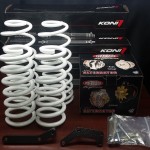
While I was at it, I decided to throw even more money at the car since it’s been a good while since she’s had a treat.  Enter part two of the suspension upgrades.  Back near the end of ’13 I upgraded the LCA, TA and PHB.  This time around I picked up a set of Strano springs and Koni STR.T shocks to replace the tired and worn out stock crap.  I’m probably not going to notice the car once these are installed as 152K on the stock DeCarbons is insane.  Most folks claim to not have even gotten 30-40K out of theirs.  So I bet I’m pretty much riding on just springs with no absorption or rebound at all.
Without further adieu, the pile ‘o parts…

Koni-Strano-Alt Relocation

It’s a Blast!

I have been wanting a blasting cabinet for a while now but even on sale they run in the $100-$200 range for the smaller ones and I was reluctant to pay that. So over the course of the past week I decided to just build my own on the cheap.

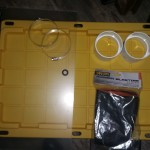
These are the basic materials that I used. A 27 gallon heavy duty storage bin, a pair of 4″ PCV couplers, a pair of worm clamps that fit the couplers, sheet of plexi, blasting gloves and a rubber grommet for a 3/8″ air hose.

blasting cabinet materials


The first thing I did was cut out a section of the container top that I wanted to use as a window.

hole cut for window

Next I cut a piece of the plexi to fit the space and laid down a good bead of silicon to seal it.  Then for good measure I threw an ample bead on top as well.

window installed

Next I marked off where the arm holes were to go.

marked holes for arms

After hacking out the circles, I put in the 4″ couplers and laid down a heavy bead on both the inside and out.

arm holes installed

After everything cured for a few days I put a hole on the lower side for air hose access with the grommet  and secured the blasting gloves to the couplers with the worm clamps.

gloves and blasting valve installed

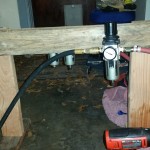
In addition to the cabinet, for the media blaster setup I also grabbed some scrap 2×4 I had in the garage and make a little stand for filtering the air between the compressor and pressure pot.

First it goes through an air filter to remove any particles that might be floating around in stream.

air filter

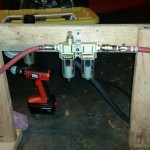
Then that feeds over to the other side and goes through the oil removal filter and desiccant dryer to make sure no moisture is getting into the blasting media.

desiccant dryer and oil removal filter

Now I just need to test it out.  Chances are that even the small pressure pot blaster I have is going to tax the small 2.5HP compressor that I have.  Might be a good excuse for upgrading to a shop compressor.

Sad Day

It is a sad day indeed when times are so tight you have to start selling off your performance car parts. I just let go of my AFX Wideband kit that I really wanted to install and monitor from within the cab but the need for cash is greater. I have several other pieces that I am likely going to be putting up soon, if there is something you are looking for let me know. Thanks!

And then I could hear…

For a while I’ve been irritated that I could not connect my phone into the stereo in my car.  I’ve been using a Satechi BT Ultimate FM transmitter.  However since the bird’s aux ports are always hot half the time it blows the fuse in the transmitter.  I had gotten in the habit of keeping a half dozen or so fuses around to fix the transmitter.  Problem is…these fuses are a bit over a buck each.  So I probably feed it 20+ a month in fuses.  I thought it time I do something about that.

I went to my local Radio Shack and picked up a 1/8″ panel mount jack that was a 3 conductor closed circuit.  I was determined to install this in the car so I could use my modern tech with the old OEM head unit without spending hundreds and hundreds on a new unit.

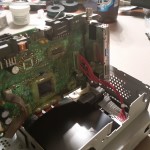
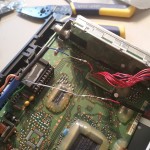
I pulled the head unit and started to break it down.  What I found was not as expected.  Wires were normally white and black.  I had everything in red.  At least they were keeping in the pontiac spirit.

20140621_025630

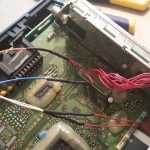
A little research later and I found out that despite the color, the pin out is still the same.  So I snipped off the left channel and pulled out a piece of CAT5 to use as an extention.  Here is a nice soldering of the left channel cables.

20140621_111347

After heat wrapping those connections I did the same to the right channel resulting in this.

20140621_112746

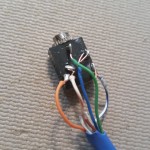
Once I put everything back in it’s place I buttoned up the head unit and went to work on the other end of the cable.  I used the switch and tagged all the appropriate items on the tabs then soldered them into place.

20140621_130605

I slapped the unit hack in the car and plugged the phone into it with pandora running.  I was so estatic that I sat there almost an hour listening to it before I decided to come back in.

Right now the cable is just hanging out in front of everything but when I have the time I need to tuck it up and hide  the connection away.


It’s a Wheel of Fortune I Didn’t Die

So yesterday I was headed off to work and as I got near my office There was a bit of a shudder, a loud clunk, the sound of tinkling metal down the hwy and a nice horrific grinding noise from the rear.  Thankfully I was only going about 20-30 at the time so I eased off the driving lanes.  I then got out and checked under the car expecting some broke suspension component or an exploded rear end.  But what I found was entirely more shocking.  Somehow all 5 lugs on my rear driver wheel had sheared off and my rotor was now resting on the inside of the rim.  I’m thinking if I didn’t have wide wheels that it probably would have gone flying.

As you can imagine it wasn’t getting driven anywhere more safe than the center lane of a hwy.  So quickly put in a call to my insurance provider to request a tow.  As I was getting off the phone a local city officer pulled up trying to help.  Unfortunately due to the circumstance of the wheel, there was just no helping it.  I told him that my wrecker was on the way but he wasn’t happy about the time estimate of an hour that I was given.  He assured me that he was there to help me and that he would stay as long as needed but continuously asked for updates on the wrecker and began to get impatient near the hour mark that I was quotes.  I called the insurance back and they got in touch with the driver and he assured them he would be there no more than another 15 minutes.  That came and went with no truck.  The officer was visibly agitated at this point and pretty much insisted on calling their own wrecker so I told him go ahead.  Fortunately my free roadside assistance one showed up before his did and I got all loaded up and taken to a local shop a couple miles away.

I explained the situation to them and they promised to get it on the rack to inspect shortly.  Well, that shortly ended up being about 3 hours before they gave me a call.  The wheel was ok other than dings and scratches but the studs, nuts and labor was going to run me $200.  And he wanted to do my brakes for another $105.  The rotor was nearly undamaged and just needed a deburring on the edge.  Told him negatory on the pads but got bent over on the studs and nuts.  But I needed a speedy repair while I was at the office so I gave the go ahead.  So now I am riding around on a fugly rim with mis-matched lugs.  I will end up replacing it later down the road but not anytime soon.

Here is a quick shot of one of the dings in the outer rim, there are several around the wheel where I assume the broken stud pieces impacted the wheel after shearing.

20140612_225701

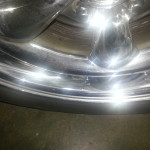
And here is a closeup of the kind of damage the inner rim suffered because of the rotor and caliper grinding against it.

20140612_225722

All other wheels checked out find.  The only plausible theory we could come up with is some kid snuck into my garage while I wasn’t looking and thought it would be funny to loosen the lugs.  And once they vibrated loose enough riding on the studs broke them all off.  I am lucky this didn’t happen booking down the interstate at 70-80mph in traffic like I was not more than 5 minutes before it happened.