Category Archives: Uncategorized

The Sound of Music

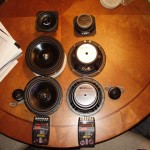
I’ve been dissatisfied with the way my stereo has sounded since I bought the car.  So as a holiday gift to myself I picked up some upgraded speakers from Kee Audio that would fit in the stock locations and run fine off the monsoon amp and head unit.  These consisted of:

  • CDT EU-61.2 6.5″ component speaker systems for the doors
  • CDT HD-6M DVC subwoofers for the sail panels
  • CDT CL-4EX 4″ coaxials for the rear hatch
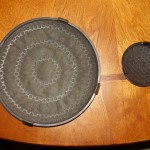
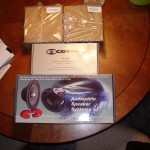
Here are a couple shots of the shiny new toys after UPS dropped them off.
The install started off well enough with removing the first door panel and pulling out the old stock component speaker and getting the new one int it’s place.  The first problem I ran into however was that the new tweeter was not just a plug and play mounting solution.  After an hour or so of trying various things to get it mounted to the old bracket using the stock grill cover I got fed up and just used it’s flush mounting pod and some body trim tape to stick it to the stock bracket.  The only issue is that the new speaker is a little larger than the stock so the door panel was a little resistant to go back where it belonged.
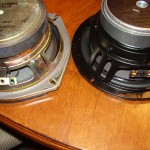
When pulling the old parts out it was nice to see GM was thoughtful enough to include wiring pigtails for each speaker.  They had however soldered the wires to the speaker terminals.  The new ones had prongs for slide on connectors so I just snipped the wires off the old speaker and crimped on some connectors so that I could re-use the stock pigtails.
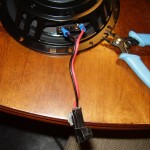
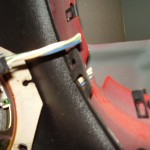
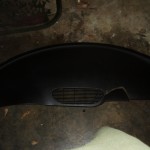
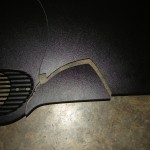
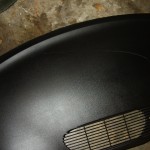
That is where my night took a turn for the worse.  When I got to the back seat to replace the sail panel subs, this is what I was greeted by when pulling off the grill.
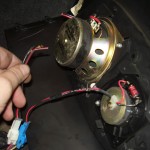
No wonder the sound quality was so crappy, there was no bass speaker.  The wiring harness was clipped off at the body panel with absolutely no slack in it at all.  What in the world possessed the previous owner to do something like this is beyond me.  Why would you not just unplug the pigtail instead of just cutting wires?  So, in order to fix this problem I had to start pulling body panels out of the car in order to get to the wiring harness.  With that situation out of the way I moved on to the others.  This is what I found.
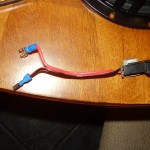
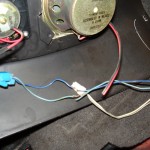
The driver side hatch 4″ speaker had the wires also cut with what could only have been a butcher knife as the copper and plastic shielding was mangled, however the tweeter was left connected.  Again, no rhyme or reason that I could see.  Perhaps they did not understand how plug connectors worked?  In addition to that, GM had riveted these speakers to the body panels so that had to be drilled out.
Moving over to the passenger hatch speaker it was again more of the same.  With the exception that not only is the pigtail cut off but it was missing altogether.  So at least we now know that the last owner was capable of unplugging the connection, just too stupid to do so except when it could get lost.  And the tweeter wires look like they’ve been chewed on by rats or some other small rodents.
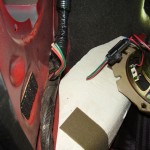
By the time I reached the other sail panel sub I was no longer surprised to see a mangled wiring harness.
So after many hours of cursing, removing & re-installing half the interior body panels and repairing all the wiring harnesses things are installed and running.  The sound system actually sounds good now that I am not getting everything out of the component door speakers.  I just have a rattle in one of the sail subs that I need to track down and correct along with finding another pigtail for that hatch speaker or finding the correct plug to make one of my own.
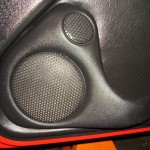
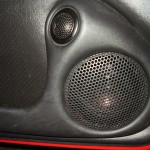
When I was putting everything back together I also decided to alter the stock grills a little as well.  From the factory they had a felt backing on them that obscured the speakers from view.
I ripped out all the felt I could then sanded away the rest that was glued on and then re-installed them.
Over all I am much happier with the sound system now.  Maybe I’ll start saving and shopping for a new head unit & amp sometime in the near future to round it out.  Maybe a stealth sub box in the back hatch area.
Shifter Mod – Part 2

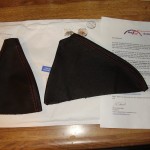
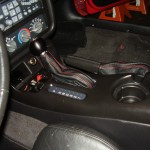
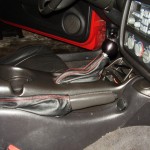
The new shifter and e-brake boots came in the mail today so I went ahead and wrapped up this install.  Here is a shot of the new boots.  Love the smell of fresh Italian leather.  🙂

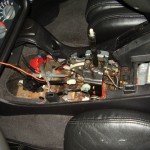
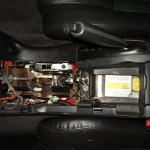
So I started pulling the old console apart and what was underneath was just putrid.  The only way I can describe what I found underneath the top cover is what you might see if you were to shine a light on the floor under theater seats.  There must have been gallons of soda spilled into the console over the years.

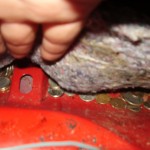
As I started to do a little clean up I began to find all sort of objects and change scattered about in there.  I’m starting to get the idea this is the culprit of at least some of the rattles I’ve had.  So I start pulling it all out and it just never seems to stop and so I start digging around under the carpet and I could feel more but couldn’t grab any of it.  So I pulled the passenger seat out of the car and pulled the flooring back and saw this.

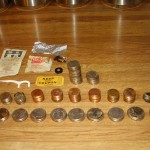
After a while of digging around between the flooring and pans I came up with a business card, dental pick, hair barrette, cough drop, foil from a cigarette pack, raffle ticket. a button, opened alcohol pads and a whopping $12.16 in change.  And I know that this isn’t all the change but I didn’t feel like pulling up all the flooring to get to any more of it.  How in the bloody hell the previous owner managed to get all of this under the shifter console I can’t even fathom.  In addition I found yet another cable randomly unplugged for whatever reason.

So after cleaning up all the console pieces a bit I installed the new boots and put the console back together.  Here are a couple shots of the finished product.


Shifter mod – Part 1

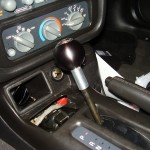
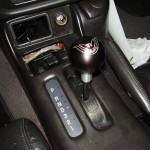
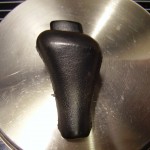
Performed the first part of the modifications I have planned for the shifter today.  The stock vinal wrapped shifters with the big button on top or t-bar with the button on the side are so dated and take away from the interior of the auto cars in my opinion so I decided to do something about that.  I picked up an adapter for the shifter that allows me to use most aftermarket manual shift knobs.  Here is a couple shots of it installed along with what the old one looked like.  I am considering trimming down the shifter a little to lower the height on it.  I will decide on that once the other parts come in and I see how they look with it this tall.

Next on the to do list are custom leather boots for both the shifter and e-brake.  The company making them is in europe so it will be a couple weeks before they arrive.  Looking forward to them snazzing up the interior a bit.


Start your suspension!

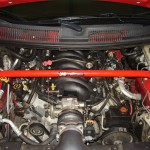
Put in the first suspension mod today.  An UMI Performance shock tower brace.  It links the tops of the shocks to stiffen up the front end.

A large portion of the F-Body community will say that this mod does nothing to assist with the handling of the car as the 4th Gens have coil over shock systems in stead of struts.  If it helps to stiffen the front end great, if not, I still like it because of the aesthetics that it adds to the engine bay.

Them’s the breaks…

The power antenna has never worked since I bought the car last October and GM doesn’t make the part any longer.  I also wanted to eventually remove the antenna altogether for a cleaner look on that quarter.  Not to mention I just simply became tired of only being able to catch 2-3 stations on the radio.  So I order a replacement solution that can be located elsewhere within the car.

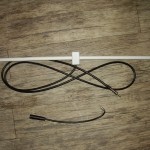
Here is the Tune Trapper and the Metra adapter needed to connect it to the stock Monsoon head unit.  It is roughly 2 feet long, has a 6 foot cable and included sticky tape on the center mounting point.

So I go to pull the dash pad off in order to put this under it and snake the cable down to the head unit and everything just goes to hell.  Every single clip and guide post on the underside of the dash pad snapped off with little to no effort on my part.  Unfortunately I expected something like this to happen as it is a very common problem with these cars.  I was lucky to have had a crack free dash pad in the first place since tons of folks complain about their’s developing cracks spontaneously.  Along with the clips, it also began to crack lengthways down the dash and eventually a large chunk just broke off when trying to pull the pad out.

So the pad is pretty much fubar at this point and I have to decide what to do about it.  I don’t really want to get an OEM replacement since it would run me between $400-$500 just for the part.  I might be able to score a used one online if I wait around long enough but that’s also taking a chance that it would make it to me in one piece.  The other alternatives would be me trying my hand trying to repair it using some plastic weld, fiberglass cloth and plastic filler or I can pickup and aftermarket dash cover such as this one:

The cover would sit on top of the broken pieces and be held down with silicone adhesive.  The reviews on the cover are pretty mixed.

On the bright side, I now have a ton of radio stations to choose from 😛


New PCM

So, things have been a bit slow lately on the mod front since there really isn’t much else I can do to the engine without dropping some serious cash.  I have been trying to mod the PCM the best I could since the cam swap but really do not have the time to dial in a good setting with the work upcoming and all.  So I bought a spare PCM from a well rep online tuner who also has a shop and I swapped it out.  Had to learn it for about 5 minutes to make it idle steady.  But it is running decent right now.  I am curious to see how the well reped tune stacks up against what I had already did.  It will give me something to compare against and see what I did right or wrong in my initial tune.

New intake manifold

I said that I wasn’t really going to do anything more to this motor and I lied.  I picked up a used LS6 intake from a member on LS1Tech last weekend and it arrived today.  Took a couple of hours this afternoon and made the swap along with cleaning up alot of the gunk that was built up on the throttle body.

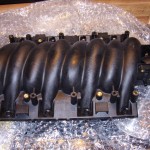
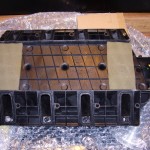
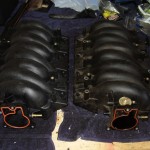
Here is a couple shots of the LS6 intake.  For being used it looks surprisingly new.  I believe the guy I bought it from said it was taken off shortly after the car it came on was purchased.  Most likely one of the C5 Z06 vettes or an end of line 01-02 F-Body.

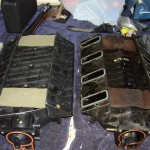
Here is a side by side comparison of the two intakes from the top.  As you can see they are nearly identical with the exception that the LS6 is missing the provision for the EGR system.  I had already removed this from my car in the spring and had it capped off on the LS1 intake.

Here is a comparison from the bottom.  This is where you can tell by visual inspection which is which since there actually were some LS6 intakes from SLP that did have EGR.  The LS6 has a flat bottom where the LS1 has a rise in the middle.  This is also mirrored on the inside of the intake with the LS6 being flat and the LS1 having a hump.  This simple redesign in the intake allowed it to flow air so much better and gave gains of around 10 rwhp on a relatively stock car.  With a cam, better flowing heads, and an opened exhaust the gains are a good bit more but vary with cam.

All I am really missing to finish out this motor before building a replacement are some better heads.  I will not go all out and get anything ported/valved as there is no point in putting a ton of money into nice heads.  But if I find a decent set of stock 243 as cast for a good price I’ll probably pick them up and swap them on since they would flow a great deal better than my 853s and net me another 15 or so rwhp.  No rush on that however since I just had my heads off 3 weeks ago and have no desire to do it again so soon.


Cam Swap – Completed

So I finished putting everything back together tonight.  The exhaust was fussy as usual but I was fed up at that point and forced it where I wanted it.  I’ll readjust it later.  It also started to over heat pretty good on the first start after a while.  It took about 3 hours of squeezing hoses and slowly adding more coolant in but I was able to take it for about a 15 minute drive without any further overheating issues.  The problem now is that it simply doesn’t want to stay running when in gear with the new cam.  Tomorrow I will play around with HPTuners and probably just raise the idle RPM by 100-150 to see if that will band-aid it good enough until I have the time to sit down and do a proper tune on it.

Here is a video of the first start.


Cam Swap – Day 7 and a half

Ok, so I lied to myself.  I chilled for a little bit, had a cup of coffee and decided to do some more work.  Ended up re-installing the other head, intake manifold, PCV system, and one set of rocker arms.  This time I really am kaput.

Maybe I won’t crash all night and can get up and wrap this thing up.  Just need to install the other set of rockers, make sure the engine turns over by hand with no obvious issues, put in the UD pulley, water pump and radiator then see if it will start without blowing the motor up.

Cam Swap – Day 7

So I spent an entire day with degreaser, brake cleaner, an ice scraper and razor blades trying to get the block deck and head surfaces as clean as possible.  The person who thought it was a good idea to move away from MLS gaskets and use graphite should be beat.  Badly.  It was a very boring and tedious day but one head is now back on.

Changing the oil pressure sending unit was more challenging that it appeared.  While it’s nut is 1-1/16 in size it was designed so that none of my 12 point sockets would actually catch on it.  In addition is was longer than any of my sockets were deep.  Turns out you need a special super deep socket just to change this unit.  At this point all the auto stores were closed and I really didn’t feel like buying a specialty socket that costs nearly as much as the sensor itself.  The nut on the sensor is also so shallow that it sits below the edge of the valley cover.  So I said to hell with it.  The valley cover was the only top end piece that was still on so I figured why now complete the job.  So I yanked the knock sensors and their harness and pulled the valley cover.  Grabbed a crescent wrench and swapped the sending unit.  Special socket?  I don’t need no stinkin’ special sockets!  One of the knock sensors was also a bit corroded but since it isn’t throwing any codes at this point I am not going to worry about it.

You really need to be a two ton gorilla in order to torque these head bolts down.  It’s especially not all that easy when you have the header flange flopping around getting in your way.  There was one bolt I just couldn’t get to torque, it ended up about a third of a turn short of where it needs to be.  I am thinking it should be ok though.  I’m more worried about having cleaned the surface well enough for the new gasket to seal properly.  After digging this deep and seeing some of the parts, it really needs to be rebuilt but I don’t have months to get that done and be without a car.  I will probably start coming up with plans to build or buy a forged stroker or move up to a larger cube motor.

I think I am going to call it a day for now and hopefully get some good progress done on it later in the day.