New Sail Panel

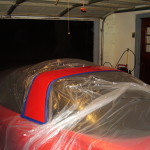
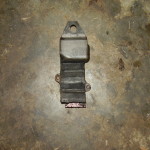
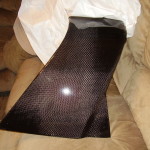
The 6LE Carbon Fiber sail panel that I ordered 4 and a half months ago was finally dropped off by UPS today.  I have always planned to put on of these on the car before I was done but 6LE jumped on the forums this summer going on about how they were shuttering the business because it was too time consuming to keep up with along side their actual jobs ect.  So I quickly jumped on the bandwagon and placed an order to be one of the limited 10 slots that were going to be done before shutting down.  Then it expanded up to 25 orders.  And as of right now the website is still live and taking orders.  So as it appears, the naysayers on the forum decrying this as a money grab tactic were right and I ended up dropping a lot of money unnecessarily early for the piece.  On the upside however I did get mine for a good deal cheaper than it is currently selling for as the price was raised by almost 67% since I placed my order back in July.  Even the shipping costs were jacked up by over 11%.  So I could really sell it for a 200-300 profit if I wanted but would rather have it on the car as it is one sexy looking piece.  Without further adieu, here is a quick shot of one section I unwrapped to take a quick gander at.

Carbon Fiber Sail Panel


Power Steering Cooler Mod

So, I set my car on fire today.  No, really… I did.  But more on that later.  About a week and and half ago my parents and I came back into town from a work conference in Nashville.  That was a nightmare unto itself, but not car related so I shant bore anyone with that.  I had parked my car at their house while we were out of town and while driving back home that night the Check Gauges light came on and the voltmeter dropped down to around 11 when it is normally around 14.  Incidentally, by fuel pressure gauge began working again.  So I thought it was just a SNAFU and I would need to check the wiring for shorts.  A couple miles down the road everything went back to normal so I didn’t worry about it.  A few days later on another trip back from the folks house it happened again with the dash and headlights getting dim so I figured it had to be the alternator.

The power steering pump has been leaking since I bought the car, which at the time EVERYTHING on the car leaked.  I didn’t think much of it and just continued to put more fluid in when the need arose.  The past few weeks however, the pump has been leaking at a much greater rate.  It would only take a couple hours to create an 8 inch spot on the pavement.  So I picked up some UV dye and put it in with the latest top off of PS fluid.  A couple days later I donned the yellow shades and hit it with my UV light.  The underside of the pump looked like some vision from a horror flick with it sobbing giant streams of florescent green.  Unfortunately glancing down from there, the inside of the alternator looked like it suffered a nuclear meltdown there was so much green glow emitting from it.  I had only put this alternator in 5 months ago when the 13 year old stock unit failed and upgraded to a larger 145 amp unit.  Now, I don’t know if it was age or the PS fluid that killed the original but I know that’s what killed this one.

So I ordered a reman pump, new upper radiator hose to get rid of the stock PS cooler and a new cooler to replace it with.  The last part finally arrived today so I got to work.  Pulled the pulley off, took out the pump.  Then I went to remove the alternator and this is where it got hairy.  I neglected to follow the prime rule of working on any of the electrical systems in a vehicle.  Disconnect the battery.  So as I go to disconnect the ground connection, the terminal post catches the grounding strap from the block to the body.  Whoooo boy that was some sparks.  And heat, which lead to fire.  Yep, all the grimy grease/fluid coated PS hoses went up like the fourth of july.  Unfortunately I did not have a fire extinguisher in the garage, an error that was corrected later in the day before I hooked things back up.  Fortunately I was able to blow the flames out but I am sure I gave myself all kinds of cancer from inhaling the fumes of that junk burning off.  Thankfully no actual damage occurred.  On the bright side, the alternator is a breeze to pull from the top when the PS pump isn’t there.

So I took the alternator and my receipt to O’Reilly’s for a swap.  At first some dude at the counter was just going to make the exchange no questions asked.  Must have been a new guy.  But unfortunately someone else walk by at just the right moment to overhear and told him to test it first.  So when they test it, yup it is dead.  But then someone spotted a little PS fluid in there and refused to make the swap after that.  So the douche nozzles made me fork out nearly $200 more for a second alternator in less than 6 months.  I could have found a better deal on ebay or some such for a stock unit out of a 6.0L HD truck or SUV but with the car being my daily driver and already down for a week, I didn’t want to wait another week to get more parts.  I also had to pick up a new ground strap which turned out to be about 5 inches shorter than the one I burned in half.  Luckily though I found another hole in the body within the straps reach so I didn’t have to tap another hole for it.

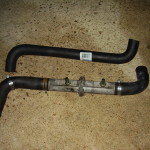
With the new alternator finally back in place I put the new pump in and went about modding the way that the PS fluid was cooled.  Here is a picture of the factory cooling system that GM, in all their wisdom, came up with.  These are the upper radiator hoses that go from the radiator to the water pump inlet.  On the top is what I was installing and on the bottom is the stock hose.

Upper Radiator Hose Comparison

As you can see it is cyborged up with a huge metal piece where it had the return line from the rack coming into it and then back out to the reservoir.  I doubt this really did much of anything to actually cool the PS fluid and likely heated it up if anything.  Not to mention the disaster waiting to happen should one of the lines in there rupture and cross contaminate fluids.

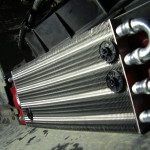
I decided to mount a Hayden 402 cooler on the body rail that runs across the front just behind the air dam.  This should be more than sufficient to keep the PS fluid nice and cool.

New Power Steering Cooler


Re-installed the pulley, buttoned everything up and topped off the fluids.  Went for a short drive and everything seems to be running well and my voltmeter is back up to 14 where it belongs.  I guess one of these days I really need to dig into the wiring and find out why my fuel pressure gauge isn’t working.  I suspect a grounding issue.

Spoiler Make Over

So after some thought and scouring through plenty of pictures of various painted spoilers for these cars I decided to pull it off and give it a make over.  I was torn as to which way to go with this for a while.  First I thought about just painting the underside of the spoiler as the pics I had seen gave it a good flair, then I considered just doing the top.  In the end however, I just said to hell with it and did the entire thing.

Here is a quick shot before work began to see how it was in stock form.

Stock Spoiler Look


And here we are with the spoiler removed.  Man, these cars are kinda fugly without the spoiler on it.  It just looks… wrong somehow.  You can also see just how much road dust/pollen/ect was caked underneath the mounting posts.

Without Spoiler


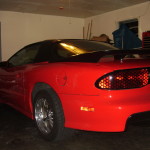
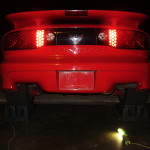
It was already getting pretty dark by the time I had it mounted back up, but here is a shot of it in the garage with what little light I could muster.  I need to grab a daytime shot of it tomorrow.

Painted Spoiler


All in all, I think it is pretty decent looking.  Not the greatest up close since it was done with a rattle can like the sail panel and bumper, but I am considering picking up some nice satin black auto paint and giving it a proper spray since I picked up an HVLP gun the other day.

Sail Panel Makeover

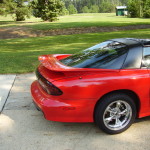
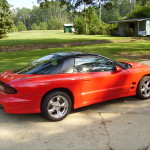
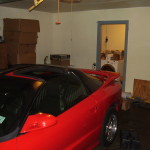
I finally took the time to paint the sail panel last night to give me an idea of what the car will look like once I get the carbon fiber panel and install it.  It didn’t turn out quite as good as the CETA mod because of the bad glue issue on the 98-02 years but over all I am pleased with the way it looks and think the black adds to the flow of the car.  Next up is to take off the side mirrors and paint them black as well.

Shot of before any work began.

Sail Panel Before Painting


All taped off and ready to be wet sanded.

Sail Panel Taped Off


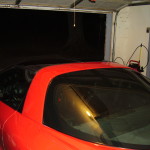
Quick shot of right after the painting was done and I removed all the masking.

Sail Panel Done


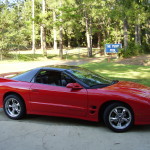
And here is a better shot of it the next day in some daylight.

Sail Panel New Look


CETA Mod

After washing up the bird yesterday and getting her back to her deserved glory I decided that I wanted to do something a little more to liven her up some.  So I decided to try my hand at a little painting and do the CETA mod to the rear bumper.  Here are a few shots of the progress and the end result.  I am pleased with the way it came out considering I have never done any auto paint work before.  I am considering making the same changes to the side mirrors and sail panel..

Shot of the bumper as it came with the car.  All the same color as the body.

Rear Bumper Before CETA Mod


And here we go after spending some time wet sanding it with 400 grit to take the clear off.  And in some cases the original paint as well.  Oops!

CETA Mod - Prepping To Paint


Here we are after masking everything else off and washing the bumper down with alcohol in order to make sure it was clean of any contaminants.

CETA Mod - Taped Off And Ready To Paint


A progress shot after laying down a few coats.  It’s starting to shape up nicely.

CETA Mod - Few Coats In


After letting the paint dry for a little while I removed the masking and we can get a better idea of the finished product.

CETA Mod - After The Paint


And here is an outside daytime shot the next day to get a better idea of how it looks out in the real world as opposed to a bright garage.

CETA Mod - Finished


Rear Suspension Upgrades

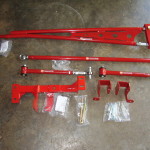
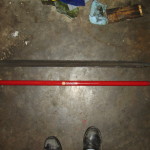
Since I have bought the car I have been mostly making power upgrades with little thought to the supporting mods.  I decided to do something about that.  Here is the pile of things that just went into beefing up the rear suspension to help keep the ass end planted on the ground, eliminate wheel hop, increase traction and center the rear under the car.

From Founders Performance we have Lower Control Arm relocation brackets, on car adjustable Lower Control Arms with poly/rod ends, on car adjustable Panhard Bar with rod/rod ends, adjustable Torque Arm and from UMI we have a relocation crossmember for the transmission that will take the torque arm off the tail housing.

Rear Suspension Upgrades


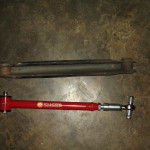
The first thing to come out was the old LCAs.  Here is a side by side of the stock stamped steel ones next to the new tubular adjustables.

LCA Comparison


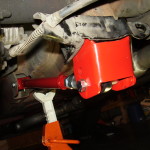
With that out of the way it was time to put in the relocation brackets which has multiple mounting points to change the angle at which the arms apply force.  The adjustability of these will allow me to move the rear front to back to center it under the car and give the larger tires some room if needed.  The only issue with this is the e-brake bracket wraps around the stock mounting.  Some folks cut part of the e-bracket off but I opted to just bend one leg of it out of the way.  Once that was done the new brackets bolted right in with a little coaxing.  Here is what they look like after it is all back together.

LCA & Relocation bracket


Next up was the PHB.  This one was as simple as just removing 2 bolts, swapping the part and bolting it back in.  The adjustability of this one will let me move the rear side to side to center it under the car.  Here is a shot of the new one next to the stock stamped steel.

PHB Comparison


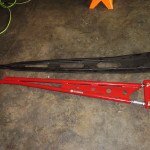
Now that the easy part was done, it was on to replacing the TA and trans crossmember.  The pieces came out fairly easily with the exception of one of the through bolts on the diff that holds in the rear of the TA.  I had to play around with putting load on the suspension and liberal use of a hammer in order to get them out.  Here is the difference between the stock and new torque arms.

TA Comparison


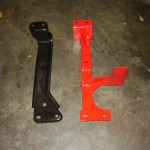
Here is a comparison of the stock crossmember with the UMI one that relocated the TA mounting point.

Trans Crossmember Comparison


After everything was removed I went to begin installing the new mounting bracket and found that the new longer bolts I picked up that go through the diff would not fit into the bracket as they were spaced for the stock 14mm bolts and the new ones were 9/16.  After a quick trip to Lowes I drilled the holes out to 9/16 and everything went in smoothly as far as the mounting bracket goes.  Getting the rod ends to line up and mount to the bracket some a little more challenging but after playing with various loads on the rear I was able to get it mounted up as well.  At this point I thought I was well on my way to being done.  I was wrong.  The relocation crossmember was an absolute nightmare to get the TA bolted to.  It comes with these allen keyed button bolts instead of regular hex heads for whatever insane reason.  It was hard enough to just get the TA to fit in the mounting bracket and get the bolts through but tightening them down became a whole other obstacle.  The top two bolts were in a space that it just wasn’t possible to get a ratchet into so I had to become creative once again.  With it being button head bolts I couldn’t just use two wrenches and call it a day.  Instead I had to take my ratchet allen socket, try to hold it in the bolt head while also holding a box wrench on the shank of the allen socket to keep it from turning while using another box wrench to tighten the nut on the other side maybe an eighth of a turn at a time.  It took forever.

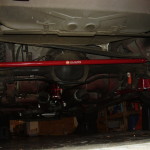
Once everything was back together I did some adjusting on the pinion angle and think I have it dialed in pretty close to where I want it.  All I need to do now is center the rear with the LCAs and PHB and the upgrade will be complete.  Here is a shot from the back with everything installed.

Rear Suspension Installed


I went for a quick test drive and the car definitely feels more solid and responsive now.  I could tell from the faint smell of some burnt rubber that a tire was rubbing under harder than average acceleration so I won’t be driving it unless necessary until I have the rear centered.  The real truth will be how it reacts to a hard launch and WOT pulls but I am quite optimistic about the results.


Some Prothane Loving

For a good while now I have had a clunking coming from under the car around the transmission on decel and coming to a stop.  I was figuring on it either being one of the mounts on the tranny tailhousing or the converter itself.  When I pulled the tranny a few weeks ago to upgrade a failing stock torque converter, I found that the torque arm bushing was pretty thrashed and figured that was my problem as it was letting the torque arm flail about within the bushing housing.  While I was out on the road the past couple weeks I order a replacement which was waiting for me when I got in late last night.  So rather than resting today like a normal person would after driving over 2200 miles in three days I crawled under my car and worked on it in the sweltering heat.

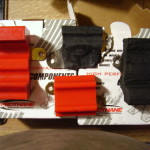
Here is a comparison of the stock rubber bushing next to the new prothane one that I installed.  The torque arm is now nice and snug once again doing it’s job.  It was definitely a job getting the clamshell mount back together after installing the new bushing as it is much stiffer than rubber, but with a little coaxing with a prybar I was in like flynn.  Took it for a drive and no more clanking.

Torque Arm Bushing Comparison


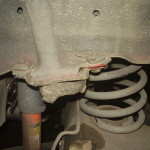
The other job I undertook for the day also involved installing some Prothane goodness.  Not too long ago I was under the car and looked up at the rear wheel well and noticed that the axle bump stops were nearly non-existent.  This usually isn’t much of a problem except that this car still has the original orange decarbon shocks which were not that great to begin with and usually needed replacing after 30K miles give or take.  I am sure the stock springs are tired as well and should be replaced.  Both of these facts are evident when riding in the car as you feel every bump in the road.  I would love to swap these out but good shocks and springs are freaking pricey.  So in the mean time I decided to replace the bump stops to see if that can help out the rear a little bit on the larger bumps.

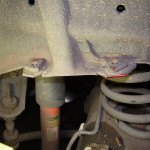
Here is a shot of just how pathetic the stock bump stops have become.

Stock Bump Stop


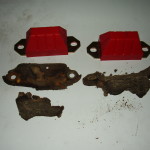
The stock unit was actually crumbling apart in my hand as I tried to unbolt it.  Here is a shot of what was left next to the replacements.

Bump Stop Comparison


Once I went to install the Prothane stops I ran into an issue though.  There was a metal tab that the stock stops rested against that prevented the new ones from seating flush.

Bump Stop Tab


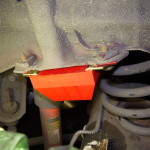
I, however, did not let that deter me.  Some people might have just shave off the corner on one side of the mount to allow it to fit in there properly, but ohhhh no… not me.  I went at it with a little creative freelancing with the reciprocating saw.  Aww yea, there isn’t anything that can’t be fixed with a sawzall.  Not to mention they are fun to play with.

Bump Stop Tab Removed


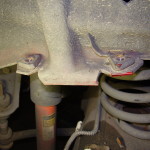
And now we have a new bump stop sitting nice and flush with the mount.

New Bump Stop Installed


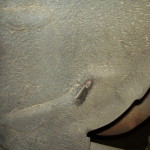
Unfortunately while in the wheel well I did notice one other issue, but thankfully not one that is huge.  It appears that the driver’s side tire has been rubbing on the well and has gone clean through to the metal and polished it up quite nicely.  Looks like I will need to get in there and do the BFH mod.  I knew it was going to be a tight fit in there running a 315 on the rear but I’d say it’s not bad if this is the only issue in the past year.  The passenger side looked fine.

Tire Rub Spot


Driveline Upgrade Completed

Well, after I got the converter installed it should be all gravy putting it back together right?  Of course not!

So the day after installing the converter I put the tranny back under the car and lifted it up and worked it into place after greasing the pilot hole and guide dowels.  I thought some of the original bolts were a little more worn than I cared for so I went and grabbed a few replacements from a local auto store.  I put about half of the bellhousing bolts back in before I realized I had not put the dipstick back in.

So this caused me to pull the trans off a second time.  The tube was very hard to work with and didn’t want to go in the hole so I read that some people would remove the grommet and slip it over the tube and all was golden.  I did this as was able to get the tube in the tranny.  I bolted the bellhousing back up using more bolts than I took out only to find the dipstick tube still didn’t sit right.  I was able to get above and push the tune down but instead of the grommet slipping in like it was supposed to it just pushed up on the tube.

Here comes trans removal number three.  Only this time one of the original bolts rounded off and I could not get it out.   I cursed much that night.  The next day I picked up alot of tools that were extraneous but good as a just in case.  Besides that I got a set of bolt extractors and went back at it.  The bolt began to turn in a manner I had met before but didn’t recognize until later when the bolt was actually out.  It was a shearing turn.  Here is a picture of the rounded off bolt once it was removed.
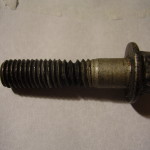
Stretched Bolt


If you can’t pick out what is wrong here it is the top end threads.  They are stretched out twice or more than their factory specs.  And if you look at the 4th thread down it is split wide open.  This bolt was a hair away from shearing off inside the block and I got lucky.  This is why in the future if I am not buying ARP replacements I will at least replace them with grade 8 or 10 bolts.  A few bucks is good insurance against future failure.

Once I pulled the tranny out the third time I took the grommet and re-worked it into the tranny and managed to position the tube so it would seat properly this time.  Lesson learned for the future.

Once I decided that I needed all new bolts it was an adventure.  It took 6 different stores in order to get 8 M10 x 1.5 40mm bolts.  But once I had them I got the bellhousing back to the block and bolted up with more bolts than I took out so it should be good and tight especially since I stuck some loctite on all of them.

Here is a quick shot of how I had to get creative with the sockets in order to make everything get where I needed.  My swivel/u-joints where too floppy so I had to wrap them in electrical tape and then I needed to put a bolt in 4 feet away so I ended up having to tape the bolt to socket.  Thing is too much tape and you lose the socket to the bolt and not enough and it would not make it.  It was a new art form.
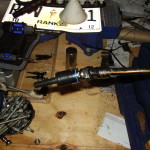
Creative Socketing

I then moved on to re-installing the rest of the car.  I get down and go to bolt up the new flexplate to the converter.  There was a 1/4 inch gap between the converter pads and the plate.  Twice what the specs allow for.  Some research said that stacking washers was a no-no so I needed a 1/8 thick washer.  Yea that is likely to be found locally.  I check out Summit and they have the 0.125 washer set for $22 which I thought was nuts for 3 thick washers.  I drive around for a few and no local store carries anything close and they send me to Fastenal.  Now normally this is a good thing but when Fastenal doesn’t have it, you are pretty screwed.  But then I remembered a place I found last fall during my cam install that had a 120mm bolt for me when no one else did.  So I headed that way and told them what I wanted.  Unfortunately they did not have a thick washer in the ID size I wanted but had one larger.  I said fine and asked how much.  When one of the guys saw me pull out my card he said that he wasn’t going to take a card for those washers and just gave them to me.  Said they would catch me next time.  Needless to say the next time I need bolts/washers/ect I know where to go.

Once I got home and put the spacers in place they pushed me to the YANK minimum spec so I  went ahead and bolted up the converter to the flexplate then reinstalled the starter and inspection cover.

Before I continue on about the trans pan and it’s new cooler here is what most consider a minor item.  I upgraded the transmission to body mount from stock rubber to Prothane.

Here is a comparison of the two side by side.
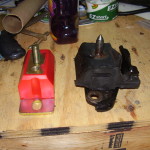
Trans Mount Comparison


Here you can see where the years and chemicals over time have destroyed the factory rubber.
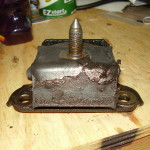
Stock Trans Mount


And here is a shot of the new Prothane mount installed.
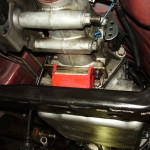
New Trans Mount


It transfers alot more vibs into the cabin but I have a plan to fix that later.

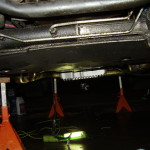
After all the bolt up I began to consider my options for a cooler.  I wanted to mount it dope style which was parallel with the ground but I apparently buy thing too large as I picked up the Hayden 679 unit.  So after some hard trying to put it where it didn’t want to go I relinquished to a normal mounting pattern against the condenser coil.

Here is a shot of the mounting
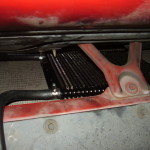
New Trans Cooler


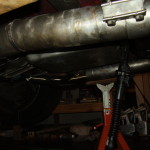
Then a shot of how I ran the lines over to the engine side
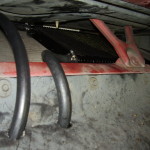
New Cooler Piping


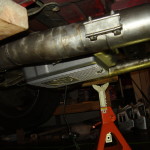
I had to make some sizable holes in the air dam but it is probably worth it.  Here is a shot of how I routed it on the other side.
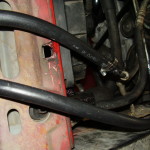
New Cooler Piping 2


After installing the lines I then decided to move on the the new trans pan that I picked up.  Here is a comparison shot of the two next to each other.
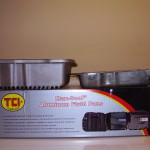
Trans Pan Comparison


I wanted to also install the trans temp sensor that I have had since installing the pillar pod.  So I went into destroying a brand new piece of hardware i had never installed.
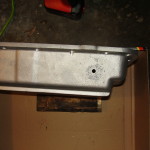
New Pan Drilled


Afterward I used my tap kit to create some 1/8 NPT threads in the hole and installed the sender.
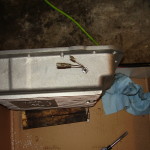
Trans Temp Sender installed


The new pan installed much easier than I had though so there are no rough shots.  But instead here are some comparisons.


From the front suspension, a comparison
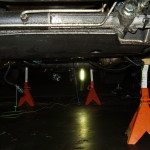
Old Pan Front View         Front View of New Pan


From the side

Side view of stock pan           Side view of new trans pan

There are plenty that say it sits entirely too low but I would have to scrape my headers to hit it as it stands now.  I feel very safe with it. I just hope I can find a tune solution to it staying at 3K RPM below lockup speeds.


Driveline Upgrades Progress

So I finally had some time to start on the driveline upgrades that I ordered all the parts for recently.  I had planned on changing the oil pan gasket in an attempt to stop an oil leak that I have not been able to pinpoint as the block was so filthy with old oil buildup that it makes it near impossible to tell if a seal is currently leaking or not.  Since on the F-Bodies you have to drop the K-Member in order to remove the oil pan I figured that I might as well replace the motor mounts while in there.  So the longer I looked at it and thought about the amount of work it is going to be to remove the entire exhaust from the headers back then remove the alternator & A/C compressor, I decided that I can live with the leak for a little while longer until I have more time available to me.

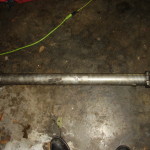
So I put the car in the air and began to tear into it.  Here is the driveshaft after I pulled it.

Driveshaft


What struck me as odd was that it felt entirely too light for a stock unit along with the fact that there was no GM or AC Delco labeling on it anywhere, just a Three Rivers sticker.  I thought maybe it was an aftermarket replacement to lighten the drivetrain geometry some.  After a little research I found out that Three Rivers manufactured these for GM and that a good deal of the LS1 F-Bodies had these as stock.  Nice bonus to have aluminum over steel.

Next I disconnected the torque arm and removed the bushing clamshell that connects it to the tailshaft of the tranny.  The stock rubber bushing is so chewed up that it is doing basically nothing for the torque arm at this point.  Another thing to add to the extensive list of things to fix.

Torque Arm Bushing


With that out of the way and the tranny crossmember removed I started working on the bellhousing bolts.  The first few were no issue as they were reachable with a regular ratchet and socket.  But I soon discovered that this was not going to be quite as easy as it it seemed.  But then what ever is.  Here is a shot of the ridiculous location of the top most bellhousing bolt.  You can barely see it above the tranny and partially obscured by the body.

Top Bellhousing Bolt


And here is the absurd extensions I had to cobble together to get out half of the bolts.

Ratchet Extensions


So after several hours of yelling, cursing and being on the verge of throwing things I was finally able to get those bolts out and that sucker out from under the car.  I use the small pool of ATF on the floor next to it as as it symbolically bleeding for me after I bled for it during the removal.  At one point an errant shard of metal from I don’t know where was in the tunnel and sliced open about half of the tip of my main index finger and logged itself firmly into it.

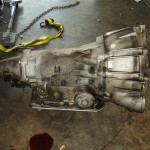
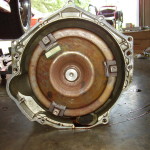
Transmission Out


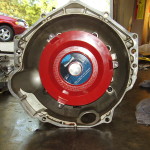
And here is the stock converter that is the main reason for all the work.

Stock Converter


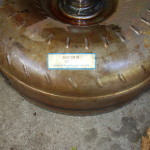
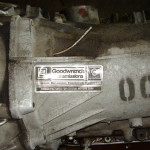
After pulling the converter out I noticed that it was a remanufacture which made me then look over the tranny itself and it also was a remanufactured service replacement.  The more I get into this car, the more I am unhappy with what I ended up with for the money.  For a stock A4 car he had to have done something catastrophically wrong for both of these units to need replacing.

Reman Converter    Reman Transmission

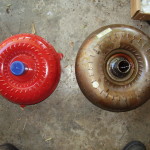
Here is a comparison of the stock converter vs the Yank SS4000 that I am replacing it with.

Torque Converter Comparison


And here is the Yank all nice and snug in it’s new home.

New Converter Installed


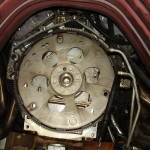
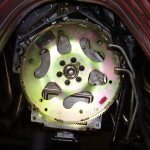
Next I moved on to working on the flexplate.  Here is the stock unit before removing it.  Didn’t see anything abnormal about it but if I am going in this far I might as well upgrade it.

Stock Flexplate


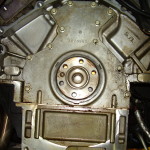
Once the flexplate was off I did a once over of the rear mains.  I was thinking that this could also be a possible source of an oil leak but it checked out ok.  I could see some very very minor oil around the bottom most portion of the crank seal but not enough to worry about going through the trouble of pulling the cover and replacing the gasket and seal so I am letting them be for now.

Rear Mains


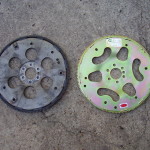
Here is a quick shot of a flexplate comparison between the stock unit and the SFI rated unit I picked up from Yank.

Flexplate Comparison


And here is the new plate installed with some new ARP bolts for piece of mind.

New Flexplate Installed


And at that point I decided to call it a day.  Tomorrow I will begin to reassemble everything.  I most certainly do not look forward to putting some of those bellhousing bolts back in.  It’s entirely possible that top most one at least won’t be going back in.


Pile ‘O Parts 2013 – Part 2

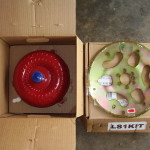
The rest of the goodies have finally came in as of this morning.  An 800lb transmission jack and engine support bar from HFT.  This week also saw the delivery of the Yank SS4000 torque converter and SFI rated flexplate.

New Torque Converter and Flexplate


Now if I can ever kick this sinus head cold that has been dragging me down all week and sapping all my energy, I can begin tearing the car apart and get the new stuff installed.  Hopefully if everything goes right I should be able to get the work done in 2-3 solid days of taking my time.  But when does anything ever go according to plan right?